Friday, February 26, 2016

The Usual Suspects

In preparation for the Friday Night Speak Easy at Con on the Cob (2015), I wanted to make some 1920's themed decorations. The thought occurred to me that cardboard silhouettes of gangsters and flappers, staggered around the room, would serve nicely. Now, one would not expect a simple cardboard cutout to be very difficult or time consuming. I honestly thought that I would be able to knock these all out in a day. Boy was I wrong!

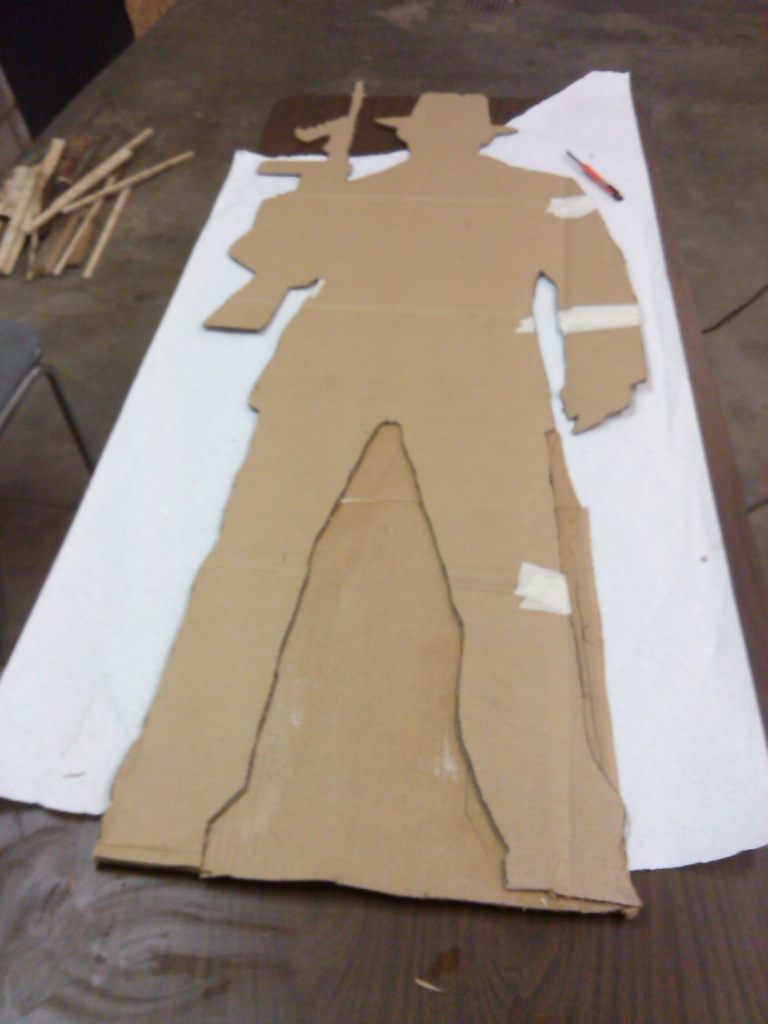
First order of business was to collect some cardboard boxes. The boxes I could get at the time were fair sized but in order to get a piece three feet wide by six feet tall, I had to cut the box to lay flat, and then, just barely. I needed to tape some gaps and there would be many fold seams that would make it floppy. It would need to be reinforced. I would need one of these for each standee, and I planned to make about eight or nine of them. Then I taped the sheet of cardboard to a wall and used an LED projector to project some gangster silhouettes that I pulled off the internet onto the cardboard.

Some friends and I took turns tracing the images onto the cardboard. It was pretty clear after a few that not everyone has the rudimentary tracing skills needed to pull this off. My friend Byron traced one that ended up with such poorly defined features, we nicknamed the character "Jimmy the Thumb", because that's what his head looked like. Needless to say, I cleaned up the lines before we continued and Byron was given other jobs to work on. After having to pull images off the internet, drag out and set up the projector (which was not cooperative), finding a place to hang the cardboard, tweak the sizing and trace all the images, that took the better part of a day. Several hours, anyway.

We traced about ten or twelve images, not all would end up being used. Each was unique, about half male gangster types, and half female flapper types. Once traced, each was carefully and painstakingly cut out with a razor knife. I took extra care in cutting them out. Any detail I could preserve in this process would improve the effect in the final product.

The single layer of pre-folded cardboard would certainly not stand up under its own weight. I knew it would need reinforced. I intended to do this with some bracing attached to the back side, but upon seeing the pieces cut out, I decided that would not be enough. So I glued a second layer of cardboard onto the back of each one. This layer was patch worked but I made sure to glue the seams well and to make sure that the corrugations ran perpendicular to the corrugations in the first layer, adding considerable strength to the piece. I had to add the second layer in sections, so that I could let the glue dry under weight to ensure good adhesion and prevent warping. This step alone probably added three days to the process!

Once the second layer was glued and dried the outline had to be cut out a second time with a razor knife. I wanted to maintain the level of detail I worked so hard to preserve in the original cutting out of the silhouette, so instead of trying to match the outline perfectly a second time, I angled the blade of the razor knife to undercut the first layer. That means the second (back side) layer would be cut much rougher and slightly SMALLER than the original first (front side) layer. The edges where the detail resides would only really be one layer thick (the front layer), but the edges didn't need extra strength, the main body is what needed the strength, so that it would stand and not flop over. This made cutting out the second layer much easier and faster. Though it still added another day or two to the project.

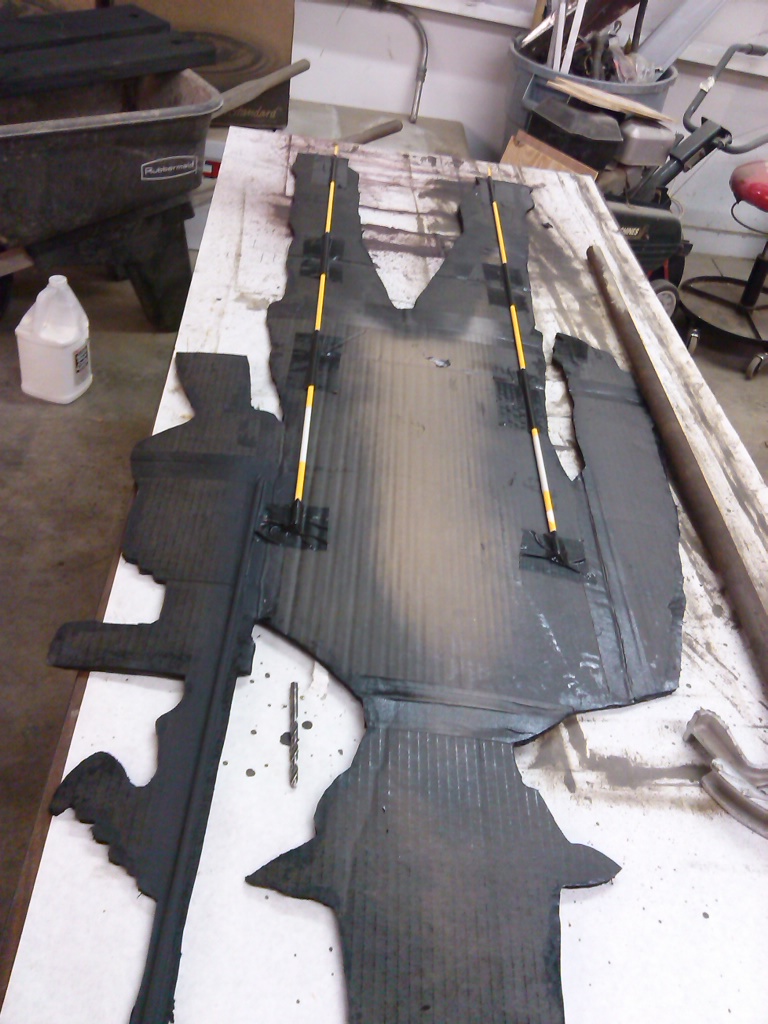
With the second layer added and cut out, each silhouette had to be painted flat black. I started doing this with tempura paint, but it added too much moisture and warping became a problem. So, I ended up buying a bunch of flat black spray paint. It took two to three coats to get good coverage. I also had to make sure I got the edges good and even painted around the edges on the back side in case anyone caught a glimpse behind one. I didn't want a flash of raw cardboard brown to ruin the effect. It probably took at least two cans of spray paint for each standee. Good thing I used the cheap ($1 each) kind! Including drying time, paint added about a day to the project.

After paint, I had to start reinforcing the small thin bits, like extended arms, gun barrels and cigarette holders, that would very easily be damaged. I achieved this by gluing on a variety of reinforcing materials to the back side. In some instances I used strips of wood, like paint stirrers, and quite often I used fiberglass rods that were meant to be driveway markers. They are very light and strong, and I got them cheap.

In addition to reinforcing the small extraneous bits, I also needed to add a central reinforcement to the body (in most cases) and a way to attach the silhouette to its base, so it could stand on its own and not lean against a wall.  I achieved both of these goals together, by using the central body reinforcement as a mounting post, extending down about an inch and a half below the foot. This post would then fit into a hole drilled in a block of wood that would serve as the standee's base. Each silhouette was different, so each had to have its own custom base and central post configuration. On some I used more of the fiberglass driveway markers. On others, I used EMT electrical conduit. Sometimes, I had to custom bend the EMT to fit the contours of the silhouette. The central posts were not glued on, but were attached with generous amounts of black duck tape. Creating the central posts probably added another day to the project.
After the posts were attached, a block of wood was selected for the base, and the holes were drilled to fit the location and size of the posts. Then the wooden bases were painted a medium grey. I didn't want to paint them black because I didn't want their shape to blend in with the feet of the silhouette, but I wanted them to be bland and non-distinct so that they would blend in with the carpet and walls. I also had to label each base with a letter that corresponded to a letter painted on the back side of its corresponding silhouette, because each one was a custom fit.

Making the standees was not enough. Once made, they had to be transported to the convention in an overloaded van without being damaged. For that they would need a custom box. Creating the box was nearly as daunting a task as creating the standees. Fortunately I did come across some larger pieces of cardboard for this task. The local Walmart had just started putting bicycles together for the christmass season, and they let me take as many bicycle boxes as I wanted (would have been nice to have these a week or two ago!). Though these boxes were big, they were not nearly big enough to hold the silhouettes. I had to frankenstein together four bicycle boxes to make one giant box (about 4ft x 7ft x 9in) that would hold all the standees. The custom box has a top and bottom, like a giant shirt box. I used some butcher paper to help pad the box and keep the silhouettes from shifting around inside the box during transport. The top and bottom of the box were taped shut with masking tape once the standees were safely inside. I kept the bases out of the box so that they didn't shift around and destroy anything. The custom box is so large and unwieldy that it takes two people to carry, and is heavier that you would think. Creating the box for the standees added another two to three days to the project (including glue drying time)!

I think in all we made four males and four females. They were scattered around the perimeter of the room to add atmosphere and the illusion of more guests at the party (though that was hardly necessary!). We taped some glow sticks to the back sides of the standees in the hopes that their outline would glow against the wall behind them, but the effect was less than stunning. Maybe with a little more tweaking that could have worked better. All in all, the standees were a big success. They made a great decoration and were well worth the trouble to make. Though transporting and storing them is a problem. What I thought would be knocked out in a day or two at the most, took probably three weeks. But they do look good! And they are well enough made that they will last for several years if treated gently. In hind sight, I may have been better off to just suck up the expense of making them out of 3/8in  plywood from the beginning. Cutting them out would have been much harder, but they would have required much less reinforcement and they would have been very durable.


Bar Caddy

The past eight months have been a roller coaster ride for me. My life has been turned upside-down and back again more than once. Now that ride is almost over, and I want to polish off a few unfinished posts before I say goodbye.

As I mentioned before, my last big creative spree happened in preparation for Con on the Cob, which took place this past October. This is another build from that event. Con on the Cob is one of the small conventions that my game group, Rogue Cthulhu, has become regulars at. It is a bit of a party con for us, as alcohol is not only acceptable, but multiple parties take place there and are scheduled as regular events (which is not to say it doesn't have a great kid friendly atmosphere too!). Last year (2014), we ran a party after hours called the Friday Night Speak Easy. It was a huge success. With little to no planning, we entertained around 60 people well into the wee hours of the morning, and got kicked out of two different rooms! This year, we put a lot more preparation and planning into our parties, and we ran two of them, The Friday Night Speak Easy, and the Saturday Costume Party with 2D6. 2D6 is a local nerdcore rap group (and yes, that's a thing) we hired to headline the Saturday night party.

Both parties were the stuff of legend! Both nights were packed. We lost count at somewhere north of 100 people each night. And an absolutely INSANE amount of alcohol was consumed. I went a little overboard with all the different kinds of alcohol I brought. I got it into my head that I wanted to make cocktails, since it was a 1920's theme for the Speak Easy, but that means a lot of different liquors and a lot of mixers and garnishes. That means we needed a more efficient way to store and present this stuff. Enter the Bar Caddy v1.0

The Bar Caddy was designed to sit on top of a 6 or 8ft long banquet table. It provides a raised platform for perching spigoted coolers, boxed wines, and drink dispensers, allowing you to put your cup under the tap without having to set the cooler on the edge of the table. It also had several cubbies underneath the platform that are the perfect size for plastic shoe boxes, which can be used to store bar towels, garnishes, condiments, giggers and the like. There is a small back stop across the rear of the cubbies to prevent the bins from being pushed through and off the back of the table, in case the table is not up against a wall.

There are two removable stops at either end of the caddy. They bolt on with small bolts and nuts. This creates a wall to keep containers from tipping over and falling off the end of the caddy. There is also a detached sliding stop that is not fixed to the caddy, but can but up against one of the containers on top, like a book end, to also help keep things from tipping over. I created these stops because wine boxes are tall and narrow, allowing for possible tipping, and because I have several stackable 2 gallon dispenser containers that I wanted to make sure didn't topple over if stacked.

The caddy was constructed from 3/8in plywood, the same as was used for the new lighting rig, posted about previously. It was stained dark brown and given several heavy coats of polyurethane to protect it from spills and drips. I took a lot of pictures during its construction, but didn't take many of it at the party. I had other things on my mind!