Showing posts with label Wands. Show all posts

Friday, June 10, 2022

Totally Cherry

         It has been more than two years since I have made something- like, actually made something, not just modified or laser etched it, but actually crafted it with my hands from scratch. The Rogue Cthulhu dice boxes were probably the last thing I really made. 

        Not gonna lie, things have been rough. Rogue Cthulhu has been retired. My gaming days have come to an end. Book of Shadows, my store, has been shut down. The building was badly vandalized and it did not make economic sense to make the repairs needed to stay open. My mental health continues to struggle. I can go weeks without leaving the house or even getting dressed. So, at this stage, for me to make something is a major achievement. But, I sold a rune set on Etsy today, and I think that gave me a little spark of energy. 

        It's not quite finished yet, but it's close. This is a hand turned wand made from locally sourced cherry wood that I seasoned and milled myself. There is going to be a crystal point embedded into the tip (where the hole is), but other than that, it is done. I was a little surprised that the piece came together with little difficulty. This is probably the first time I have touched my lathe in three years. It isn't perfect, but considering how out of practice I am, it's pretty good.


        I love this batch of wood. The color is very pleasing. Even the sapwood is nice. I've got quite a bit of it, so I expect I'll be doing a lot of projects in cherry in the future. Now that the store is closed, I'm going to have to focus more on online sales in order to have any income. My needs are small, but I've been bleeding money for the past two years, so it's either make internet sales, or get a straight job, and I'm a little too old and jaded for that! 

        I have a couple more wands that I started years ago, and got them to about this same point and never finished them. I think I'll try to make a couple more, and then add the tips to all of them at once and post them in a batch. I was just so excited to have accomplished something in the workshop that I had to post it, finished or not. 

 P.S. I'm not dead yet. 

Friday, June 1, 2018

Three More Wands

A few weeks ago, I got back into making a few wands on the lathe. They turned out pretty good, and I was happy that I finally got to use some of the wood that I had been drying. I wanted to capitalize on that momentum, so I cranked out a few more.

The smallest one is made from "Tree of Heaven" (Ailanthus). It is basically considered a "junk" wood, because it has wide growth rings, contains a lot of water, and cracks and twists horribly when drying. It's also kind of a boring ugly color. Not good for much from a woodworking standpoint. But I have a bunch of it and I was eager to see how it turned. For smaller items like this, it's not too bad. Certainly usable, if not particularly pretty.

The middle one is more of that elm I worked with the other week. These were some of the first boards I slabbed and dried. It doesn't have a particularly interesting grain pattern, but it has a nice warm color and it turns well.

The bottom one is a piece of recycled oak. I'm not really thrilled with the way the handle turned out, but someone might like it.

 I think I need to start doing some different designs. I feel like I'm in a rut. My wands are starting to all look the same.

Friday, April 20, 2018

Engraved Wooden Wand Case v1

Hot on the heels of my recent laser engraved Goetic Seals Box, I found another use for some of those pre-made wooden boxes that you find at the craft store.

This is a 7x2 inch wooden box that I have sanded and laser engraved with a design on the lid, which I had selected specifically to use in conjunction with some 6" selenite wands which I carry in my shop.

After engraving, I sealed the box with two or three coats of de-waxed shellac. Then I set about trying to install a foam and cloth lining to cradle the rather fragile selenite wand.

The foam part of the lining came together very quickly. I used 2mm craft foam and positioned it in such a way that the springiness of the foam would create a soft cradle for the wand on the bottom of the box, and also a pad on the underside of the lid would apply gentle pressure to keep the wand from moving around.

The bottom foam piece was cut extra wide and the edges and center folded down to make an M shape. The sides of the box will hold the edges in place. In order to keep the center down, I glued it down to a scrap piece of chipboard that would run along the bottom under the foam.

The short ends of the box also needed some padding to protect the tips of the wand, so I cut two pieces of 2mm foam (two for each end) to tuck into the end of the box. I had to trim the M piece a little to make room for the end padding.

BTW, pay no attention to the fact that the colors of the foam change in some of these pictures. I lined more than one box and had at least one failed attempt and I just used whatever color foam I had laying around. I knew I would be covering it with cloth anyway. Each picture may not be from the same box or stage of the project.

The cushion on the lid was just a simple piece of 2mm craft foam cut a little wide so that it would bow out a little bit from the lid. This will offer some gentle pressure to keep the wand from moving around when the lid is closed.

The foam part came together quickly, but the cloth part was a pain in the ass. I ruined at least one set of foam parts experimenting with how I was going to cover it with cloth. I originally intended to use velvet, but I thought satin would be easier to work with because it is thinner, and I knew I would be tucking the excess cloth behind the edges of the foam. Sorry, it's hard to see much detail of the cloth work because it is black.

The lid was the easier of the two sides, but even that took two tries to get an acceptable, if not perfect result. The satin cloth is spray glued to the craft foam and the ends are turned under and also tacked with spray glue. The short ends were kept a little sloppy so that the excess cloth would hide the small gap created by the bowing of the foam.

Pro tip: don't use super glue with craft foam and satin cloth. It soaks through the cloth very quickly, bonds to your fingers instantly, and dries very slowly on the foam.

The bottom side was even more problematic. At least two failed attempts were made trying to cover this assembly with cloth. Again, I used spray glue to tack down the satin to the craft foam. I had to wrap the little end pads in satin separately and just tuck them in on the ends. I tried to cover them at the same time as the main piece but that didn't work out well. Even just covering the main piece had a lot of little issues that had to be worked out. Tucking things in here, folding things under there, making sure not to impede the design of the M shape of the foam. Difficult to explain, but take my word for it. There were issues.

Anyway, it all got worked out satisfactorily. The lining wasn't quit as nice or as easy to make as I had wanted it to be, but the end product is quit a bit better than the cheap pre-fab wooden box I started with. This will up the value of the selenite wands considerably.


Saturday, March 24, 2018

Bibbidi-Bobbidi-Boo

It's been almost two years since I've made a wand on the lathe. I made about twenty wands, and then I got sick of them and started making pendulums, and then I built the Roubo workbench, and then I didn't go back to the lathe for a while. I've been kind of missing it, but the workshop has been a mess and there have been other things going on. Yesterday, I decided to throw a chunk of poplar dowel on the midi-lathe and see how it felt. Just to see if it came easy or if it came hard. Turns out, it came easy.


I turned that chunk of poplar dowel into a short wand in about a half hour, and it didn't turn out half bad. No plan, just free form. The night was young, so I thought, why not make another one? This time I wanted a nicer wood. I don't care much for poplar. It is soft, has an ugly color and uninteresting grain (IMO). I pulled out a piece of walnut from my storage rack, but then I put it back. I wasn't feeling quite up to that yet. Then I decided to have a go at one of the pieces of elm that I had slabbed and stacked to dry last year.


I hadn't made anything yet from any of the lumber that I cut last year. This would be the first piece. I cut a 2" strip from the straighter side on the band saw and chucked it up in the lathe. It doesn't cut too bad.


Though the original board had a little bit of color to it, the final piece seems a little drab and the straight grain doesn't excite much, but the greatest appeal to me is that it is the first piece to be made from wood that I gathered, cut from a log into a board, and dried in my workshop. Watching it go from tree limb to finished piece is kind of satisfying (even though it is a year long process).


... baby steps.

Tuesday, January 3, 2017

Rose Quartz and Jatoba Wand

Just a quick pic of my latest wand. It is a short wand, made of Jatoba wood (Brazilian Cherry) with a polished Rose Quartz point at the tip.

I was originally trying to make a full sized wand, like my usual (around 16 inches or so long), but I had an issue during the turning. The wood blank split on me just as I was finishing up the handle. I managed to salvage the handle , which will become a 2-part wand, and this was the left over part, which would have become the shaft. I decided to salvage the broken piece and make it into a smaller wand. Later, I added the quartz tip.

Jatoba wood is very beautiful, but seems a bit brittle and splintery. It seems to crack easily. I will have to keep that in mind when using it in the future.

Thursday, April 21, 2016

Hand Turned Wooden Magic Wands

I have long thought that one of my key weaknesses, when it comes to crafting skills, is my over generalization. I have far too many interests pulling my attention into too many directions, so that I never become truly skilled in any one technique or media type. The absolute last thing I needed was to break into a new crafting medium, so of course that's exactly what I did!

For many years I have wanted to try my hand at wood turning, but I did not own or have access to a lathe. Well, a few moths ago, I broke down and bought a cheap midi-sized lathe from Harbor Freight, along with a set of gouges. I have been playing with it in short bursts, between other projects, since then, and I am just now getting to the point where I am beginning to be proud of the pieces I am producing.

And just what am I producing? Wands. Hand turned, wooden, magic wands, which I intend to sell in my shop.

Although I had wands in the back of my mind all along, my initial interest which prompted me to purchase the lathe was in producing pens- hand turned exotic wood executive style ink pens. If you have been to any gaming or hobby conventions like GenCon or ComiCon, you've probably seen people selling turned wood pens in one of the market booths. They are a fairly common and popular item among the kind of cottage industry woodworkers who make things like jewelry boxes and dice cups. And they are not cheap! Some of the exotic wood blanks for making these pens, in raw form and not including the pen hardware, can cost over $20 for a 3/4 square by 6 inch long stick. That's twenty bucks for a piece of raw wood the size of a piece of peal and eat cheese!
Needless to say, I had no intention of shelling out big money for exotic hardwoods until I had some practice under my belt. I didn't even want to spend the money on the specialty tools and supplies for pen making until I was ready to produce something, so I started out by just hacking up scrap 2x4's into 2x2x12" pieces that I could practice on. My first two attempts were primitive, but marginally successful. I had no idea what I was doing or how to use the tools or machine, so I watched a couple of YouTube videos for basic instruction and just started hacking away at some scrap wood to see what each of the chisels would do.
By my third piece, I actually went into the work with an actual finished item in mind- a wand. A wand was something I could do that wouldn't require exotic woods or special tools or supplies. My first wand started off looking promising, but part way through I hit a knot in the wood and the piece broke. Then I set the whole thing aside for a while, as my life took a few unexpected turns.
Eventually I came back to the lathe, and watched a LOT more YouTube videos on tool use and basic technique. And I watched quite a few that were specific to making magic wands. I watched, mesmerized, for hours while other people turned spindle after spindle- watching how they used the tools, watching how they approached the work, stealing design ideas, learning good turning technique, learning finishing techniques, figuring out what kinds of upgrades to my tools and accessories I would eventually need to invest in.

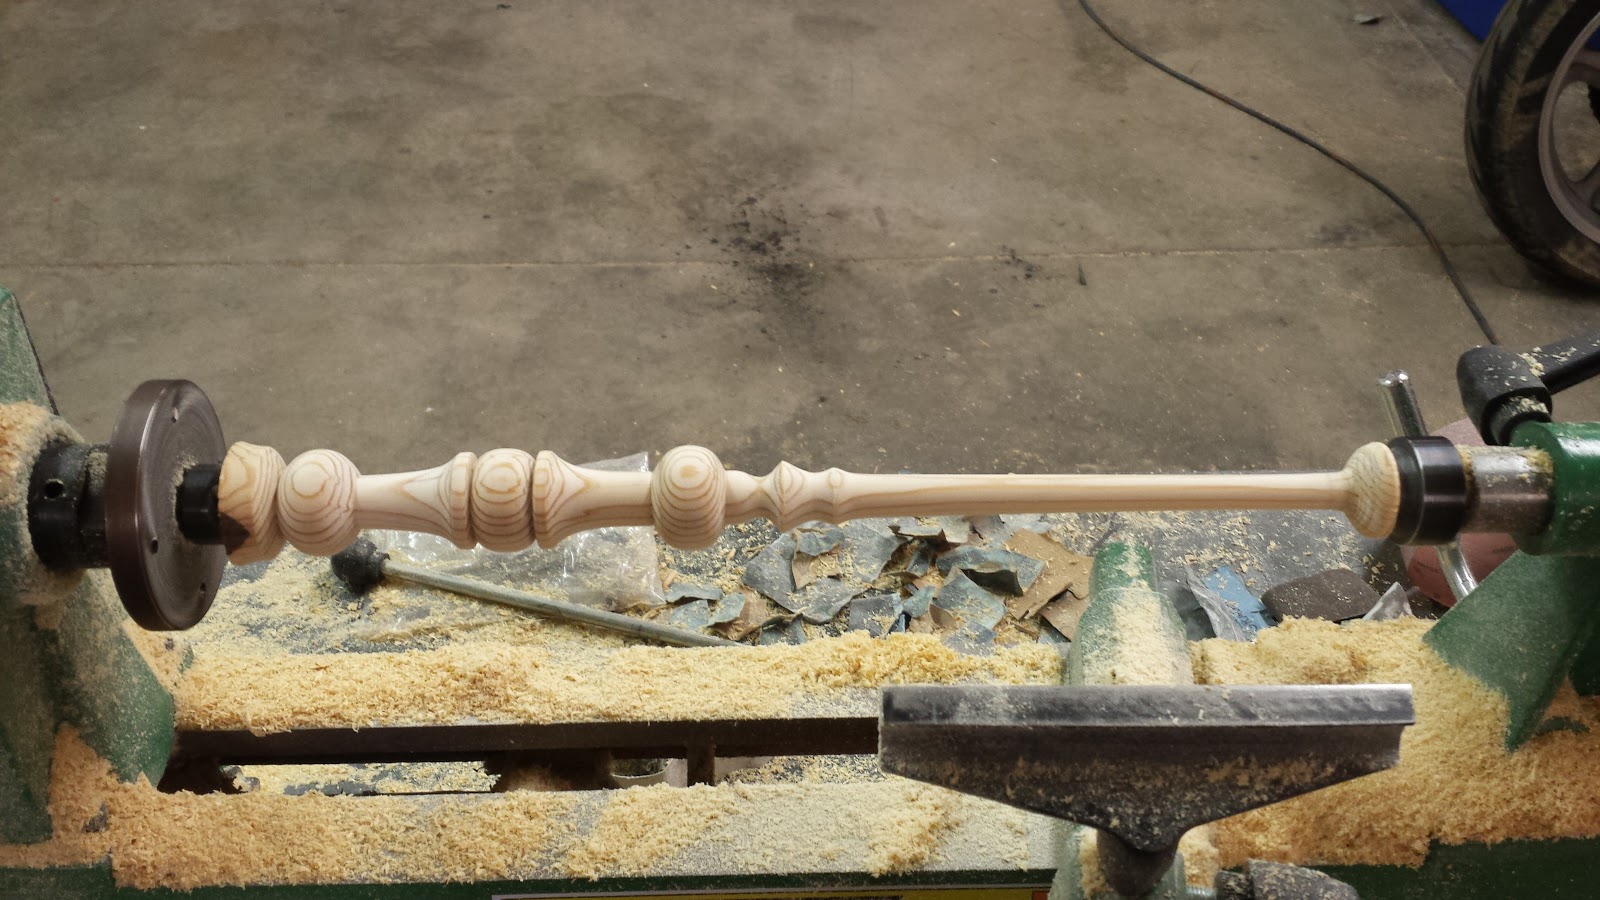
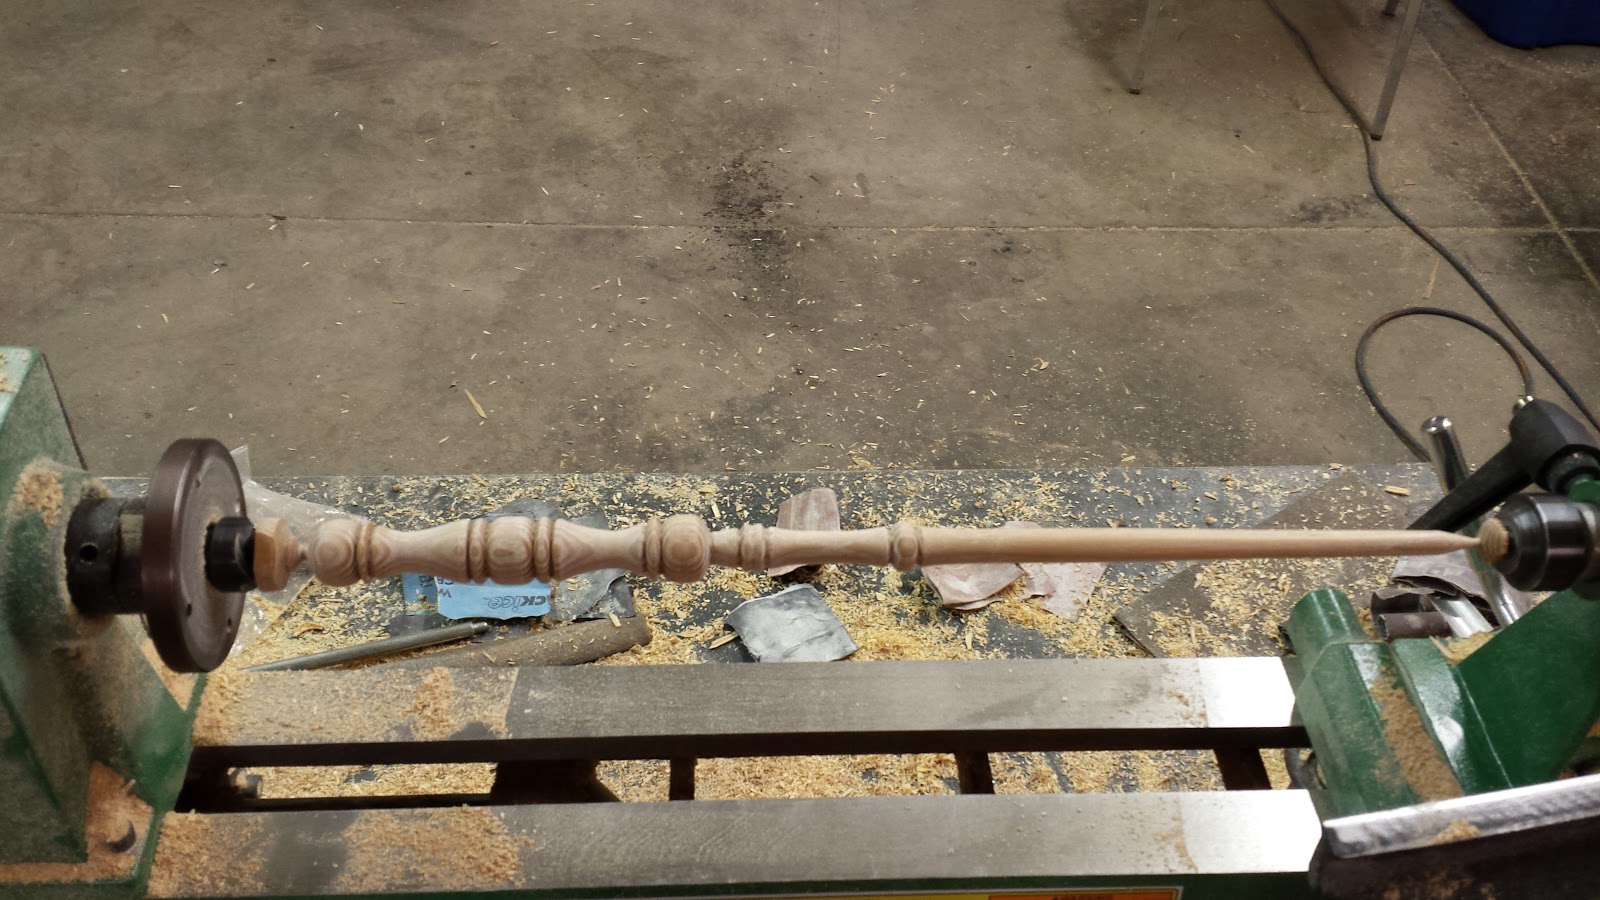
My second attempt at making wands gave me trouble at first, as the work piece would start to vibrate a lot while I was tapering the long shaft of the wand. Afraid I would break the piece again, I decided to just turn handles and add the shaft as a second piece made from a tapered hardwood dowel. So I made a dozen or so handles, usually two at a time, all from scrap lumber. I saw a good bit of improvement, but my skills were still fairly primitive.
Eventually, after watching even more YouTube videos, I solved my vibration problem and went back to making single piece wands. The handles looked nice, and were faster and easier to make, but I was having trouble getting the hole for the dowel to go in straight and centered. My first full sized single piece wand turned out well enough that I abandoned the two piece model, for the time being, and refocused on making single piece wands, like I had originally intended.
Now I was starting to really be happy with the pieces I was producing, and each new wand I made was my new favorite. I could honestly see a steady progression of improvement in my skill from one piece to the next. I learned how to apply stain and finish directly to the work piece while it is still on the lathe, which makes the finishing process much faster and easier. For finish, I'm using a combination of friction polish, or shine juice as it is sometimes called (which is a 1:1:1 mixture of shellac, boiled linseed oil and denatured alcohol) and CA (cyanoacrylate - also known as Super Glue). Surprisingly, CA makes a very hard, fast drying, incredibly durable, high gloss finish that is easy to apply, but the fumes are killer.

I now have nearly a dozen single piece wands, finished or nearly so, and about a dozen wand handles that I will finish eventually once I solve my drilling problem. I will probably throw out a few of the handles and maybe a few of the early single piece wands. I'm finally making pieces I am proud of, and some of my earlier attempts, though I was happy with them at the time, look sad in comparison. In fact, I just went out to Amish country and bought some moderately priced hardwood scraps and a few upgrades to my tools. I'm about to take my game to the next level, and who knows, maybe in a month or two I'll be ready to buy some of those exotic woods!

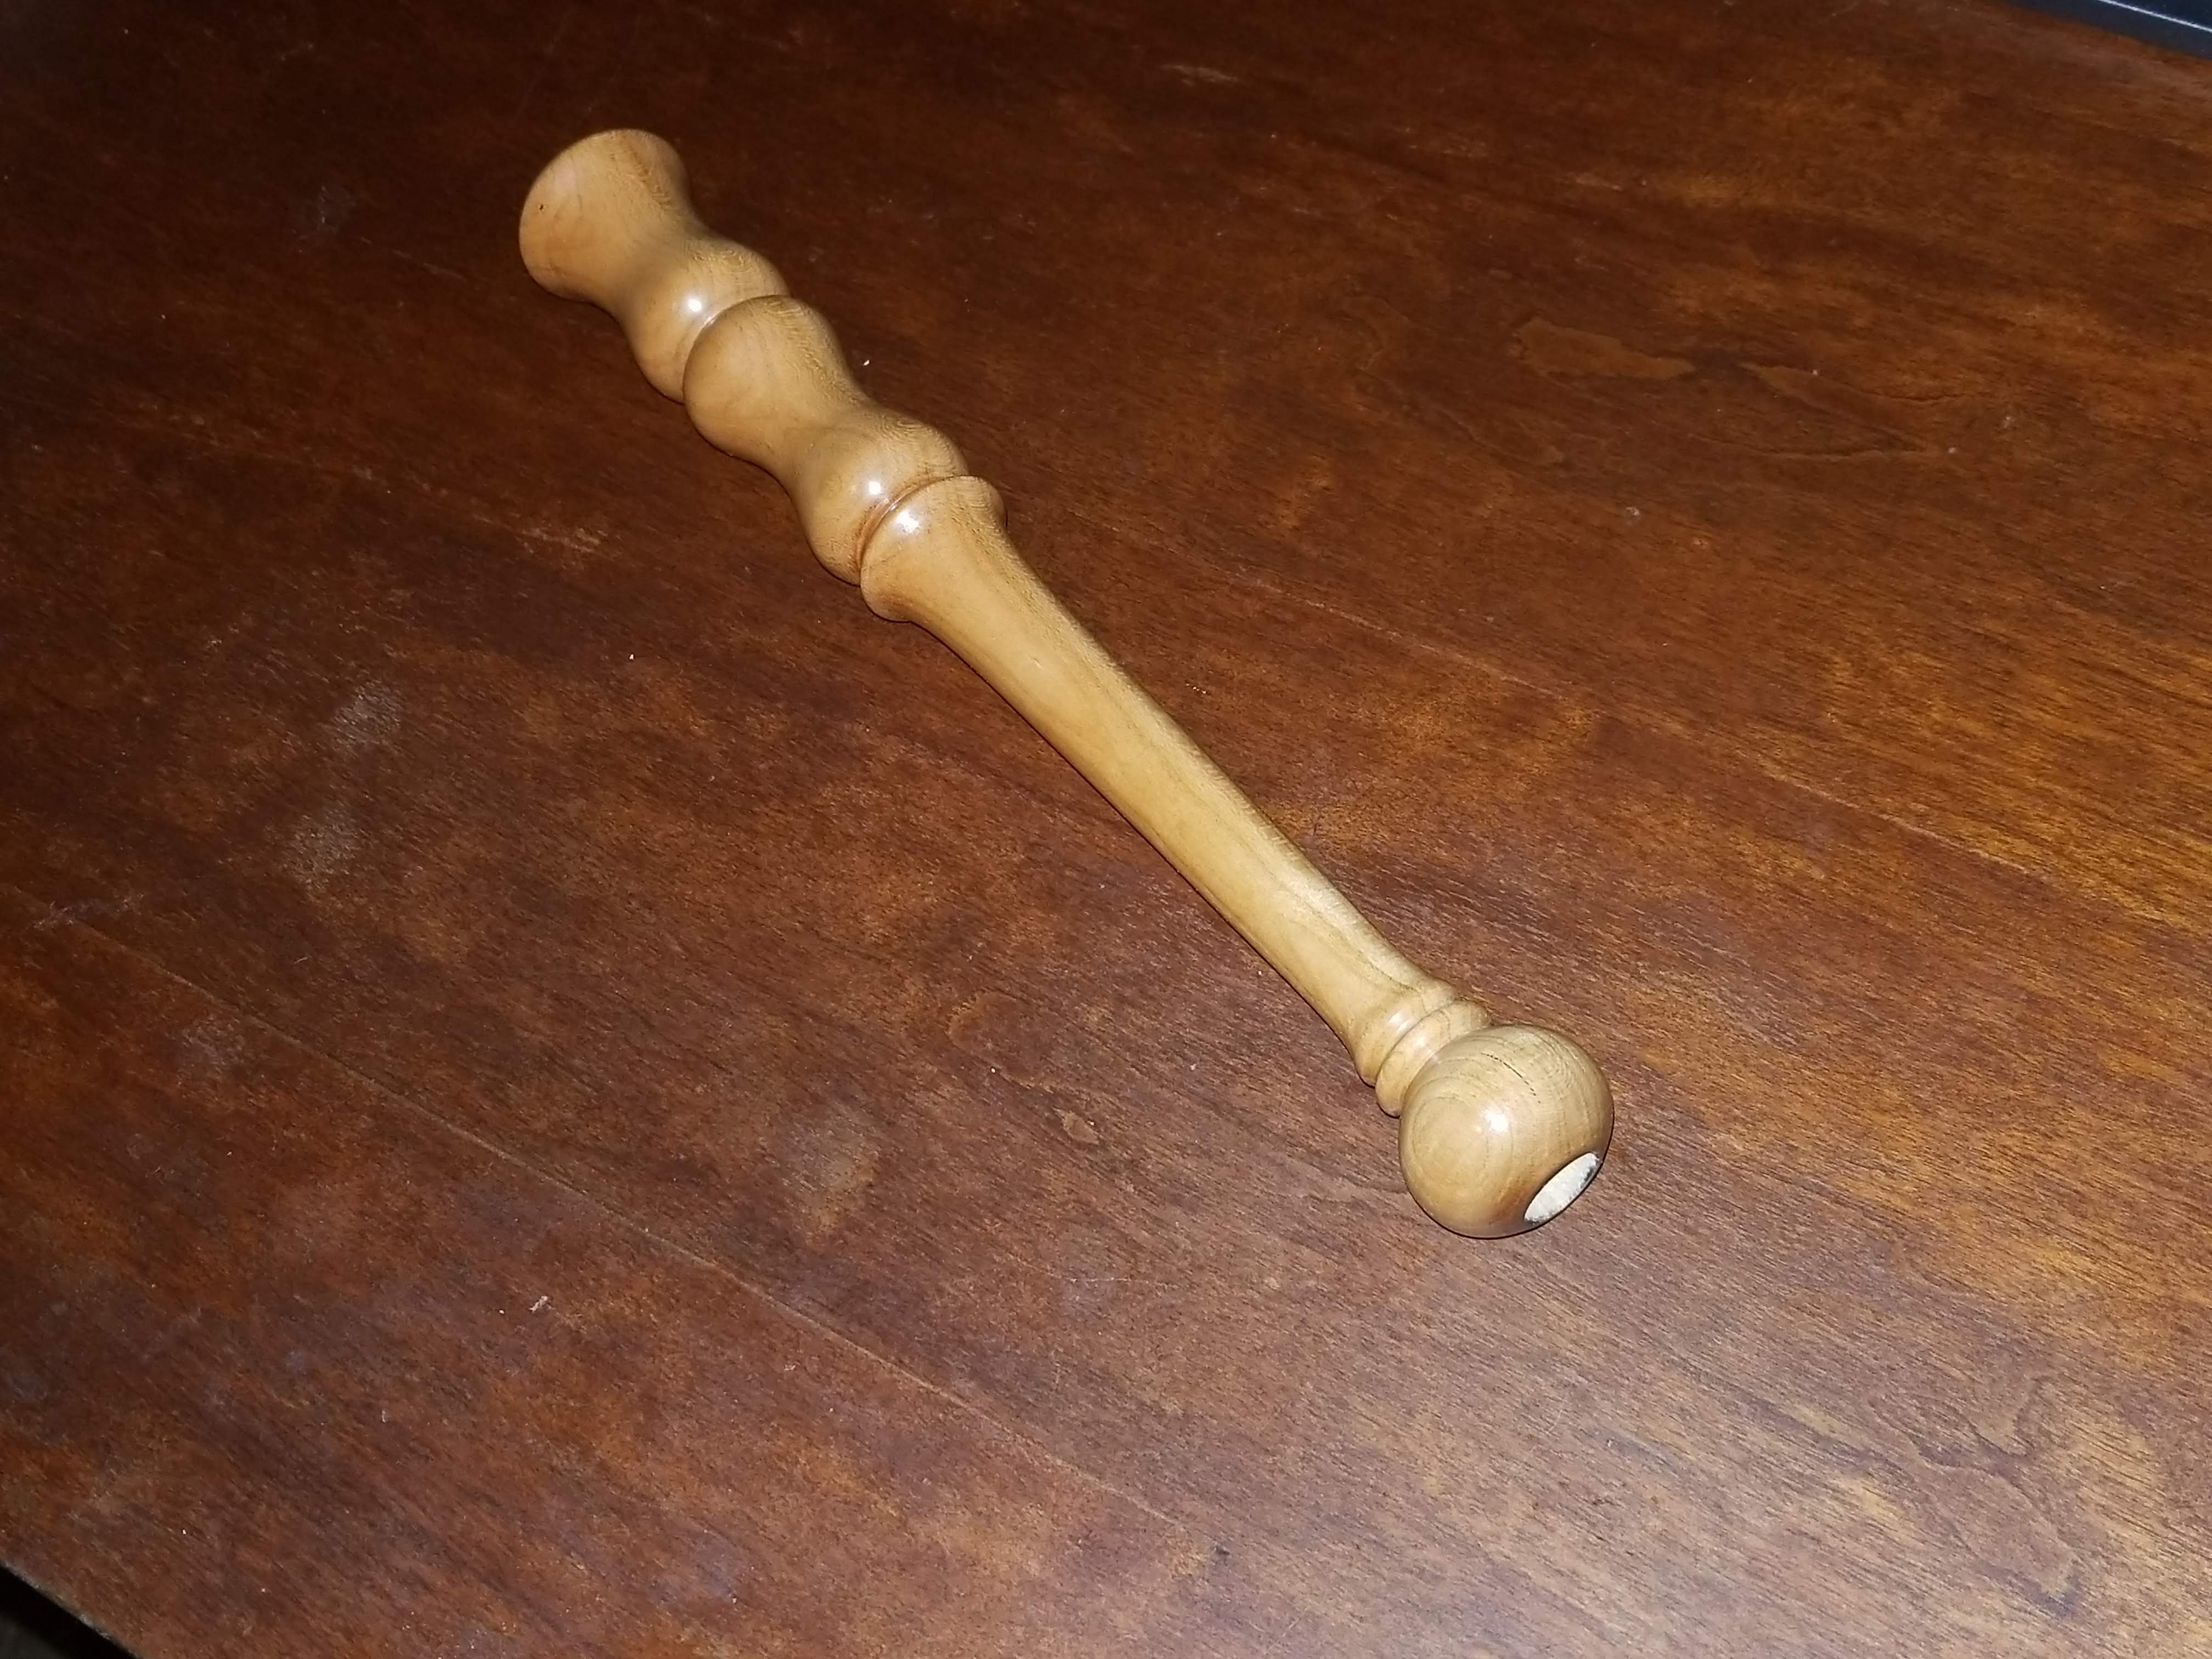
And now, the glamour shots of my first batch of finished wands.
 The wand above is my first attempt at laminating two different kinds of wood together. I started with a piece of oak that was wide enough for the shaft but not wide enough for the handle. I glued a thin scrap of black walnut to either side in the handle area to thicken it up. When I turned it, only a little bit of the walnut remained, but it made a striking and beautiful pattern against the light oak.