

Here is the wood that I am talking about. I showed it in a previous post. This was old cribbing material that was used on a semi-truck. It cleans up real nice, don't it?
I was already planning on making some inexpensive custom planchettes on my laser cutter, and had already begun laying out a design on the computer. I made a few adjustments and printed the design out on paper.


You can ignore the decorative elements on the paper template. They will not be incorporated into this project. I spray glued the paper template to the wood and cut it out on a scroll saw. Then I refined the shape on a disk sander. When following a template like this, always cut just outside the line, then sand up to the line. I had to use a spindle sander to get into that little divot on the ass end, and I used an 1.25" forstner bit to drill out the hole. The cut pieces were sanded smooth and finished with two coats of shellac.

These particular ones will just have an empty hole, but I have some 40mm glass cabochons on order for future planchette projects.
I liked the way these came out so much I decided to look around for some other scraps of wood to make some more. I have a small pile of off-cuts left over from slabbing some beautiful aged cherry logs. I grabbed one of the larger ones and ran it through the planer about a hundred times to get a usable plank, about a half inch thick.


I looove this cherry wood. Trust me, these pictures don't do it justice. When you get some finish on these, or splash some mineral spirits on it, the color just lights up like flame! These are off-cuts that are mostly sapwood, so the effect is less dramatic, but there is still a little of that flame in there.

I used the same templates and glued them to the cherry wood and repeated the same steps as I did with the spalted maple; cut out, drill, sand, shellac. Here are the finished cherry planchettes.

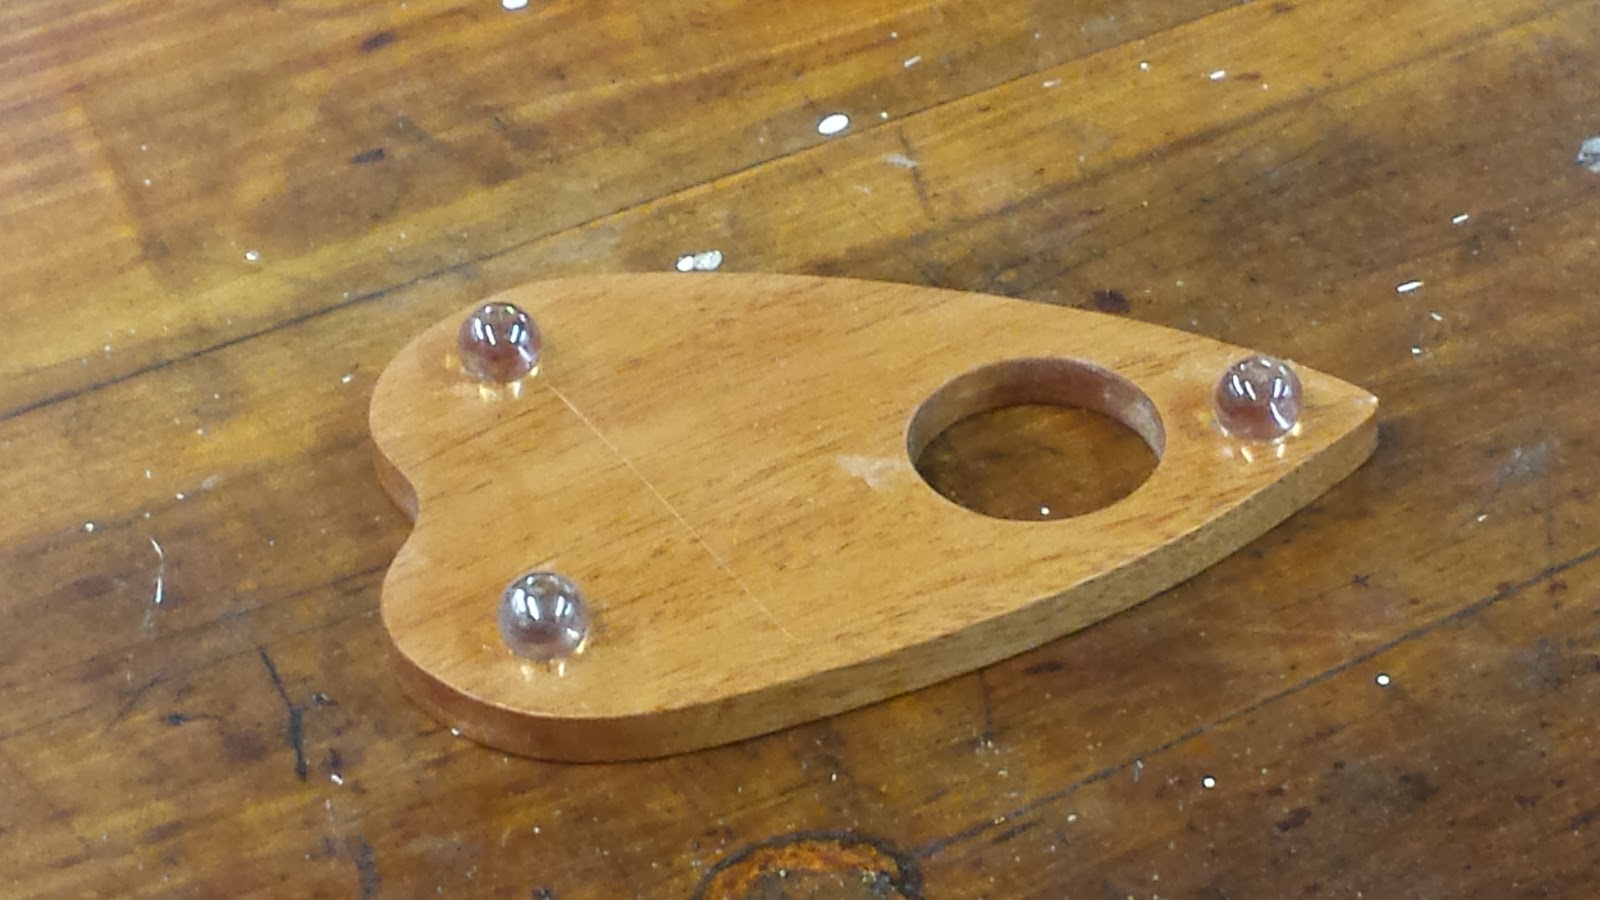
The final step is to put feet on them, so that they slide smoothly across the board. I was originally going to use those craft store glass drops that people use in flower vases, but they were a little too big and not uniform in size/shape. It would have worked, but I didn't like the way it looked. Instead, I decided to drill a small indent into the underside in three places, and glue in a glass marble.

Unfortunately, I struggled for several weeks to find marbles that I liked for the job. I checked all the local places; craft stores, dollar stores, discount stores. I checked many of them more than once. No luck. I wanted black glass marbles. I even looked online, but had trouble finding what I was looking for at a reasonable price. I finally found one item on Amazon, which I ordered, but it never showed up! I waited over two weeks, and eventually the order got canceled and refunded. Then I found another offering on Amazon. It was for black glass marbles, but slightly bigger than I wanted, and I had to get five pounds of them!
So, after a month of searching, and two Amazon orders, my black glass marbles finally arrived. They were not as small as I would have liked (I originally ordered 14mm and ended up with 16mm), and they were not as high of quality as I would have liked (noticeable surface creases), but they were the right color, and they showed up, so off we got to installing them.


I made a few test holes in a scrap piece of wood to see what size hole, and at what depth, would give me the surface profile I wanted. I tried 1/2" holes and 9/16" holes for the 16mm marbles, and the 9/16" holes, drilled just deep enough that the marble doesn't bottom out, seemed the best. I have to be careful not to drill all the way through some of the thinner planchettes. I wasn't originally going to drill into them for the feet, so the first few planchettes I made were planed a little thinner than later ones.
Note: Just about every time I use the word "planed" (as in, running a piece of wood through a thickness planer), I have to look it up to make sure I am using the right spelling, and I'm usually not. If you see me writing "planned", or "plained", just roll with it. Sometimes I miss one, or I forget to look it up, or I think I remember the proper spelling from the last time I looked it up, and have it wrong again.


I looked through my stash of parts and found three colors of marbles that were smaller than 16mm. I don't like the colors as well, but someone else may have different tastes, so I decided to use some of the smaller marbles as well.
Although I still think black is the color of choice, the more I look at them, the less I like the black marbles I got. They are too big and too imperfect. I doubt I will be using very many of them. The tiny clear marbles I found at Michaels are my favorite so far. I did find one website that had exactly what I wanted, and for a reasonable price, but the shipping was outrageous. I wouldn't pay it. Anyway, I've got five pounds of these ones I don't like. I'll probably sit on them for years.

Here are the first two batches all finished. These are spalted maple, mahogany, cherry, elm, and mulberry.

 |
| Spalted Maple |

 |
| Spalted Maple |

 |
| Cherry |

 |
| Spalted Maple |

 |
| Spalted Maple |

 |
| Cherry |

 |
| Cherry |

 |
| Cherry |

 |
| Mahogany |

 |
| Mahogany |

 |
| Mulberry |

 |
| Elm |

 |
| Elm |
The shellac finish on the second batch gave me trouble for some reason. I ended up putting it on really thick and sanding it back to try to smooth it out, then i followed up with a coat of paste wax. I was not happy with the finish at all, so for the third batch I tried something different.
I have a third batch that is now finally finished, which are slightly different. We'll call them v1.5 (next time).


