Tuesday, January 27, 2009

FF-01 Particle Stream Cannon

Finally, I've finished posting my back catalog (as much as I plan to for the moment) and am up to something current. Quite current actually. I just finished this piece yesterday. I've been in a real steam-punk mood for the past couple of months. I've been awed and inspired by the works of Datamancer, Jake Von Slatt, Prof. Albrecht Von Taggërt, and others. I'm still cutting my teeth, so I haven't made anything anywhere near good enough to be truly proud of, yet. But I think what little progress I have made is encouraging. I still have a very long way to go before I'll be turning out the kind of work to which I aspire.

I'm always amazed when I see what creative uses other craftsmen have made of the most mundane items. I am constantly looking at someone's project pics and saying "Ooo, that's cool. I never would have thought of using one of those." I try to keep my eyes and mind open to what things could be, instead of what they currently are, but I only rarely spot that diamond in the rough. Last week I happened to be strolling through The Flower Factory (a local wholesale club) and my eye was caught by an obnoxiously bright red and yellow crappy plastic squirt gun. I don't know why I even gave it a second glance. I wasn't interested in a good squirt gun, let alone a crappy one, but something made me stop and look at it for several seconds. I was just walking away when it hit me, "Hey, that thing actually has some pretty nice lines. Maybe I could do something with it." It was only $3, so I thought I would give it a try.

Man, do those Chinese love their little tiny screws. This thing has to have like 40 screws in it! And of course they have to hide at least one under another part. Once I got the thing apart, it was comical how simple the internal mechanism was. It could have been empty for that matter. It works even crappier than I expected (which is to say it barely works at all). Oh well, I didn't intend on actually using it as a squirt gun anyway (though that could have been cool too).

I wasn't sure what exactly I was going to do to mod this gun, but I knew I was definitely going to give it a good steam-punk paint job. As soon as I saw it, I knew that I wanted to paint the rear tank, and other bulbous parts, copper. Seeing the rear tank immediately made me think of a copper toilet float for some reason. That turned out to be a lot harder than I expected. I have like six different kinds of copper paint, and ironically, none of them look quite exactly like copper. I ran through all of them, and eventually settled on a multi step process which basically incorporated all but one of them. Finally, after some trial and error and about eight coats of paint, I got a finish I was happy with, complete with a mild verdigris patina around the edges.

Next I started looking at which parts I wanted to be brass. I used a gold spray paint for the brass parts, and surprisingly, it went on smooth as silk. It even covered in one coat. I went over it with a light coating of copper glaze (one of my myriad of copper products) to give it a little red sheen, hoping to get a finish that was less gold and more brass. It looks OK... until you put it next to actual brass. Masking off the areas that I wanted to be brass, but that weren't separate pieces, was tedious and time consuming, and my least favorite part of the process. I got lucky in that none of the paint leaked under the masking tape, and the tape didn't pull any paint off either. I gave all the brass pieces a wash with a dark gray paint that was supposed to be the top coat in a pewter antiquing finish. You brush it on, then wipe it off and a little stays in the recesses. Then I did a little dry-brushing with gold acrylic paint for highlights. I find that to make a finish look authentic, you need three layers; your main color, some darker shades in the crevices, and a lighter color for highlights. Those of you who actually paint well, are probably saying "Duh..." right now, but I'm self taught, so I consider this a milestone in the refinement of my technique.

I waffled a bit on what color I wanted for the main body. I actually painted each half a different color, to help me decide. Then, when I did decide, and I painted the second half the same color as the first half, the color didn't come out the same, because it had the second color underneath it, so I had to paint the first half the second color, then back again, so they would match! [I know that's a terrible run-on sentence, but that's how I talk.] I ended up using the same "hammered" metallic black spray paint that I used for the body of the Maverick Rev-6. It didn't "hammer" much this time either. Maybe it's defective. Hit the recesses with a black Sharpie, dry-brush highlights with some silver acrylic, and it's done.

I'm very new to steam-punk modding, so I only made a couple of small additions. First was the LED flashlight at the muzzle. It was one of those that you clip onto your baseball cap. I cut off the clip, glued it in what I thought was an aesthetically pleasing position, painted it to match the gun, and added a small piece of red cellophane to color the lens. I originally attached it with super glue, which was a mistake, because it was not strong enough. The light broke off while I was putting the guts back into it. I reattached it with epoxy. The glue is on top of the paint now, but you can barely see it. I also would have preferred to mount the light on the other side, so that it might fit into a right handed holster, but it would have been in the way of one of the screw holes.

The other small addition I made was the pressure gauge. I figured, "It's got a big copper tank... it needs a pressure gauge". I mounted it on the opposite side as the light, for balance. I created the gauge from scratch, and am only moderately pleased with. The main body of the gauge is made from a Coke bottle cap, and to me, it still looks too much like a Coke bottle cap. The dial was designed and printed out on my computer. The front rim is a brass plated insert for a wooden candlestick. I had to cut it'd neck down with a Dremel, then I glues a piece of acetate to the back side of it to serve as the glass for the gauge. After that was glued in place, I epoxied it to the side of the gun, using a brass hex nut as a spacer.

A quick cote of matte finish, and it's done! Because of the type of plastic it is made from, the paint is prone to scratch off easily, so I have to treat it a little gingerly. Next time I'll try a different primer. Also, next time, I'll be sure to paint the inside and outside. You can't hardly see it when you are holding the gun, but I noticed in the pictures that some of the bright red and yellow interior can be seen through the slot for the pump slider. Oops.

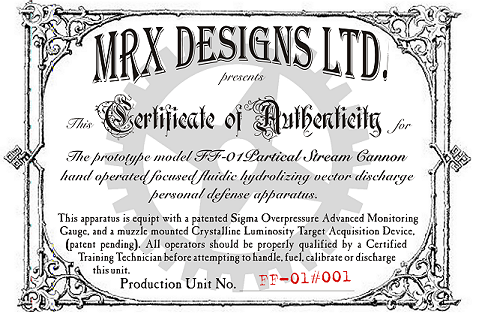
UPDATE: Ooh, I've just thought of a better name for it- the MRX Designs prototype model FF-01 hand operated focused fluidic hydrolizing vector discharge personal defense apparatus. I also changed the short version from FF-01 Beam Cannon to FF-01 Particle Stream Cannon. Because it shoots water particles... In a stream... Because it's a squirt gun. (waits hopefully.... sighs).

I've also created a Certificate of Authenticity from the manufacturer.

Monday, January 26, 2009

Maverick Rev-6

I LOVE this gun! The Nerf Maverick Rev-6 has beautiful lines. It just screams to be tricked out steam-punk style. A few months back I stumbled on some pics on the internet of one of these that someone had repainted in a somewhat steam-punk style, and I just fell in love. I had never had much interest in Nerf guns before, and I had never heard of this particular model. I started snooping around and found dozens of sites where people had made modifications to various Nerf guns, both physical mods and paint mods. Who knew there was a whole sub culture of people out there that modified Nerf guns? Immediately I had to have one. At 4:00 in the morning, after reading about a dozen webpages about Nerf mods, I ran out to Wal-Mart to find one.

If you've never seen one of these in its natural state, here a re a few pics. Even without any modifications, it's a beautifully designed piece. It fires six foam darts in (reasonably) rapid succession, from a working revolving barrel which swings out just like a real revolver for reloading. It reminds me of "The Samaritan" from "Hellboy". My friend thinks it looks like a "bolt thrower" from Warhammer 40k. They are surprisingly inexpensive (around $9) and shoot fairly well for a toy. Mine shoots about 25 feet reliably (with about a 2 foot drop) and is accurate to about 6" at that distance (indoors).

I took mine apart to repaint it. The insides are not too complicated, especially if you read a primer beforehand and know what to expect when you open it up. I didn't go crazy with the physical mods, but I did pull out the air flow regulators and cut off the center pin guides so it could fire home made darts (called "stefans", after the guy who first made them). Despite what I had read, I didn't really see much performance improvement from these mods. I actually think I may have lost a little power. I also carved off the "Nerf" logo and the "Caution: Do not shoot in eyes" warnings, but left the "N-Strike" logo and "Maverick Rev-6" markings. My primary area of interest was paint.


I used spray paint for most of the parts. I used a hammered copper for the top slide, trigger, front barrel edge and muzzle. I used bronze for the main body of the barrel. I used a gold/brass for the back of the barrel, grip butt and rear hammer tip. The main body of the gun is done in hammered black metallic. You can't really tell that I used a "hammered" finish paint. For some reason the hammered part just never materialized. I guess it had to do with the atmospheric conditions at the time. I like it this way better anyways. The brown handle and brass rivets and screws are the only parts I painted by hand. I also did a little dry-brushing for highlights and used a black sharpie to darken some of the crevices to make it look a little more realistic. Without those little touches, the paint job seemed kind of flat and fake.

It's a simple paint scheme, and I basically copied it from another I saw on the internet, but I like it a lot.

Baphomet Tome (1&2)

A few years ago I had an idea for a way to quickly and easily produce interesting eldritch tome props. I figured that if I sculpted a few specially designed embellishments, and then made RTV molds of them and cast them in resin, I could make up a bunch of pieces and just glue them in place (after painting of course) as needed. That way I could reproduce the same kind of design over and over very easily. It took me a while to put this idea into practice, and it wasn't quite as painless as I had envisioned, but it did work. These are two examples.

Each of these two tomes is basically the same, except that they each use a different style of corner pieces. The core book is volume A of the Grolier Encyclopedia of Knowledge, which I paid $0.09 each for as part of a promotional scheme at the TwinValue Superstore (now closed) way back in 1993. I did end up purchasing the entire set for myself, and I ended up buying about a dozen copies of volume A, because it was such a great deal. I figured I'd use them for something someday. I didn't think it would take me over a decade to do it.

I started by recovering the book with a red vinyl upholstery cloth with a reptile skin finish that I got cheap at the Surplus Junk Store (yes, that's actually its name). I did insert new end papers to cover the raw edges of the covering material, even though the prop was designed to remain closed (only the exterior of the book is getting an overhaul). Then I cast the decorative pieces for the front and back covers. These were actually cast in large batched well in advance, so technically that last sentence is a lie;) The center piece, the baphomet head and pentagram, were originally found on the lid of a jewelry box. I made an RTV mold of the lid and cast it in resin, cutting off the areas I didn't need. The corner pieces are my own creation. I sculpted the originals out of sculpy polymer clay and made RTV molds of them. I made about nine or so different designs and I mix and match them as I choose. The first book I made has writhing tentacles coming out of the corners. The second has corner pieces reminiscent of iron bindings that were inspired by a picture I saw on the internet. The center piece and the corner pieces were painted with my ubiquitous bronze finish and given a heavy coat of clear lacquer to prevent scuffing from use. They were glued in place with Weldbond, my favorite type of glue.

Next came the lock and latch. This part actually took more time than any of the other adornments (not including the re-covering) because it involved some fabrication. I had to cobble together a hinge, a hasp and a piece of latigo leather with glue and brass brads, all of which had to be modified to fit together. The lock is a tiny brass luggage lock. I gave it a shot of amber translucent spray paint to dull its color and make it look older and tarnished. The lock and hasp works, and keys were included. The book could be opened, but it was intended to be used as a static prop, and remain closed. The final touch was the gilding of the edges. The edges of the text block were painted with a gold leaf marker to achieve this finish.

I was very happy with the way these turned out. They are one of my favorite projects and one of the props I am most proud of. The first book was sold on eBay. The second was available on the Rogue Cthulhu prize table for a while, but was eventually sold on eBay also.


Cloth Covered Cthulhu Diary

I love book binding. From binding to covering, ever since my first year of college, when I would ignore my assigned homework and go to the university library and just look up eclectic avenues of independent study, I have been fascinated with the art of book making.

This is one of a series of four books I re-covered recently. They are all very similar. I chose this one to show you because it is the one with the clearest pictures. It started out as a Cambridge brand Executive journal, about 5"x8", with lined pages. I picked up several of them cheap (about $1 each) from a local discount store (Marc's). I sat on them for a while because I didn't know quite what to do with them (I do that a lot). Finally I decided to re-cover them and add a Cthulian medallion to the front cover and sell them on eBay.

Before re-covering them, I cut out some scrolling tentacle like designs and a thin border out of a very heavy cardstock called "chipboard". I used white glue to glue that to the front and back covers of the journal after sanding and scoring the journal's original vinyl "leatherette" cover with a razor knife (for better adhesion). Then I cut a scrap piece of black heavy cotton fabric big enough to cover the book and applied a healthy coating of Elmer's spray adhesive onto the cloth and the book cover (using waxed paper sheets to keep the glue from touching the text block of the book). I wrapped the book in the cloth and pressed it down with my fingers, making sure not to pull it too taught, because I needed some slack to wrap around the raised areas created by the chipboard. I used the blunt end of a bamboo skewer, and my fingers, to press the cloth into the crevices around the chipboard. This created a nice sculpted surface with lots of character. Sort of a reverse embossed effect, like a bas-relief. I'm sure this technique probably has a name, but I don't know it. After wrapping in the edges and applying new end papers to hide the edges of the new cloth cover, I used white glue to apply one of my cast resin medallions (which had purposely been cast very thin for such an application) with the ubiquitous bronze finish (the only one I'm good at).

Sunday, January 25, 2009

Bronze Medallions

I went through a phase recently (and by recently, I mean about two years ago) that lasted quite a while (and by quite a while, I mean about two years), where I was doing a lot of RTV mold making and resin casting. I love this media. It is one of the most satisfying artistic media I have worked with to date. Around that same time, I was also going through an "antique bronze" phase. Probably because that seemed to be the faux-finish I was best at painting.

I call this piece the "Azathoth Medallion" (I call everything with a central eye and radiating tentacles after Azathoth). It was originally sculpted out of modeling clay (Kleen Klay) and is about 3 inches in diameter. It was inspired by a piece I saw on the internet that had the same basic shape and a similar outer ring, but had a different central design and less of a lovecraftian feel. Then I made an RTV mold of the original and cast it in resin. The resin piece was then hand painted with a bronze finish.

I have this great set of metallic finish paints (bronze, copper, pewter, iron, etc.) that have real powdered metal suspended in the acrylic base. The same brand also makes a verdigris patina wash that actually reacts with the metal particles and creates a nice authentic patina as the paint dries. I got these paints on the reduced rack at my local craft store (Pat Catan's), so I don't know if they are still available, but I love them. These are some plaster castings made from the latex molds I made for my Stone Elder Sign Disks, that have been painted with the bronze finish. I used a 50/50 blend of plaster of paris and dental plaster (Excalibur brand). This makes for a cheap and very strong casting. This bronze finish is also how I learned to do dry-brush painting. Sorry I don't have more/better pics.

Ichor of Abn-Sur

I made this nice little prop set a few years ago and then sold it on eBay. I was quite pleased with the way it turned out. I have always intended to make more of them, but so far I haven't. Possibly because it didn't sell for as much as I had hoped. Also, all that carving is time consuming, and I have a very limited attention span. ...And I hate repeating things. I get bored when I try to repeat something I have already done.

The set consisted of three parts, a box, a bottle of ichor and a scroll. The scroll was printed on 8.5"x14" paper and it was weathered and distressed in my usual fashion, with a few burnt edges and a drop or two of blood (Dragon's Blood ink). It featured text in the Lovecraft font and several seals from my Book of IOZ. I can't remember if the text was gibberish or if it was cut and pasted from an actual occult text (as some of my pages are). It's been a long time. In any event, the scroll was created as a visual prop, and held no intrinsic significance.

The box was about 3"x3"x5", roughly, and was made of bass wood (the common kind of unfinished box you can get at a craft store) with brass hinges and clasp. I stained the whole thing dark brown (American Walnut) inside and out. Then I penciled in glyphs on all sides (except the bottom). The glyphs were also chosen for their visual appeal, and hold no particular significance. The central design on the top of the box is the Seal of Cthigla, which I pulled from my Book of IOZ mythos. The glyphs were engraved using a Dremel tool, then blackened with a Sharpie marker. I gave the thing a few random knocks with a hammer to make it look a little distressed and aged, then I put a top coat on it. I can't remember if the top coat was a polyacrylic varnish or if it was boiled linseed oil. I know I did a box similar to this and finished it with linseed oil as an experiment, but I'm not sure if this was that box.

The glass bottle was one that I got in an odd lot from a wholesale club called "The Flower Factory". I used my Dremel tool to engrave glyphs all around the top and bottom of the bottle, and also one large glyph on the side. The central glyph is the "Sigil of Abn-Sur". It is another glyph of my own devising that has become part of my own little sub-Mythos and that I have incorporated into many of my props. The bottle was then filled with water that was colored (I can't remember exactly what I used to color it, but I think it was green food coloring with some dissolved yellow acrylic paint thrown in) for effect. The bottle had no stopper of its own, so I used a cork. I held the cork in the flame of a butane lighter for a few seconds, then rubbed it with my hands to give it an aged and deteriorated look. Then I tied hemp twine (the kind used for hippie jewelry) around the neck of the bottle and across the cork to act as a primitive seal. I rubbed a little Dragon's blood ink and some soot from the burnt cork into the twine after it was wrapped to make it look ancient and dirty. The bottle fit into the box perfectly. I folded the scroll up and wrapped it around the bottle so it all fit nicely inside the box.

I was disappointed in the price it fetched on eBay (only around $20), but otherwise I liked this prop very much. It was just too labor intensive to make more of them if they weren't going to sell for more than that.

The Book of IOZ

This is a work in progress. It was started several years ago, and then was set aside. I still have it, and someday I may finish it, or maybe not. I only have this one picture of it at the moment. I will put up a few more if I have time. The book itself was a 5"x8" blank book with a black bonded leather cover and unlined pages. I can get them fairly cheap (around $6) from one of my wholesalers. As an experiment, I decided to paint each page with a generous slathering of my paper aging mixture (tea and instant coffee), which ended up soaking the whole book. In an other experiment, I tried to see how it might dry in the microwave at work. Hint: Things do not dry in a microwave. It did, however, get very hot, warp the book boards, and the pages, and wrinkled the bonded leather covering. At first I hated it and thought that I had pretty much ruined the book, but after a while, I started to like it. It definitely looks weathered. The book boards are flattened out some now, and the wrinkled covering looks quite authentically old and haggard.

It is actually the source of many of my more inspired pieces of art (seals and geometrics and the like). Since the book was already bound (and weathered) all the contents had to be filled in by hand, which is mostly why it isn't finished yet. I had envisioned it as being a sort of cultist's journal, documenting the eldritch lore that he accumulated. I started by drawing in a title page, thus naming the tome "Liber IOZ". Then I peppered in a few original drawings of occult seals and strange geometric diagrams. I just put them in at random intervals throughout the book, figuring I would then back fill the empty pages in between with cryptic writings. Later I ended up scanning the pages to get the images out of the book so I could use them for other projects. That was a challenge since the pages were already aged. The images had to be cleaned up in photoshop rather extensively.

As time went on, I would insert text as the mood struck me. I ended up creating a small bit of Mythos around some of the seals I had drawn, such as "Cthigla" and "Ag-hoth", and other "Pipers of the Void". If I ever get around to taking a few more pictures of the tome, I'll post about a little of its Mythos too. I use it quite often in my other creations. It has become more of a reference work for me than another project to be finished.

Special Edition Necronomicon Pages

So far I have only made a few of these. I wasn't completely happy with the way they came out. They are the same designs as my regular Necronomicon Pages, but they are blown up to 11x17 and are printed on a very heavy art paper. The edges are hand torn and the artwork is hand colored with acrylic paints. Then they are stained in the usual way, but they are dried flat so they don't wrinkle. Finally, they are coated on both sides with a polyacryilic varnish, which gives them a sort of leathery and brittle feel.

These pictures do not do them justice. The painting really makes the art pop, especially the disembodied head. For some of them I also rolled them into a scroll and added a leather thong wrap to keep it closed. The decorative fob on the leather thong is a rune tile that was made from actual bone. It was cannibalized from a rune set that was missing a few pieces. It stunk to high heaven when I drilled the hole to thread it on the thong.


Necronomicon Pages 1-5

This is by far my most popular and prolific prop made to date. With quite a few pages having been produced and distributed since their creation around 2003. There are five sets of pages with four pages in each set (and another bonus page that is only available to select customers).

Each page was laid out in Corel Draw. Much of the text was taken from actual occult manuscripts (e.g ancient latin texts, and the writings of Aleister Crowley) which were then set in one of several cryptic fonts. The artwork is a combination of my own creations (mostly geometric line art), medieval woodcuts that I found on the internet (and which have been in the public domain for several hundred years), and original artwork by Bryan Reagan, aka ZARONO, which he sent me copies of and very generously gave me permission to use however I wanted. I can't thank him enough for that. He sells great items on eBay almost constantly. I highly recommend you check them out.

The pages are photocopied on a high quality machine (thanks to my former employer) and then distressed. I use a Dremel tool on the edges to rough them up. Then I soak each page in a bath of tea and instant coffee. I keep the mixture around for ages, so it ends up with lots of authentic slime and mold in it that imparts unique patterns to the pages :) Then they are dried, usually over an air duct or in front of a space heater so that they warp and wrinkle as they dry. Then they are sealed into a cardboard box with about a pound of granulated myrrh gum. I keep them in there for about a week and shake the box up every few hours (whenever I pass by it). This helps to draw out any remaining moisture, giving the pages a dry crisp feel (with a lightly dusty/powdery texture from the gum residue), and replaces the coffee smell with the deep rich earthy smell of myrrh. Mmmm, smells just like you would expect a mummy to smell! Lastly, I burn a few of the edges and then splash on a little Dragon's Blood ink to look like blood splatters.


Stone Elder Sign Disks

This was my first foray into carving and also my first foray into mold making and casting. I started off by hand carving an Elder Sign (the Chaosium version) in relief, into a block of paraffin wax. Not such a bad job for my first time, if I do say so myself. Then I coated the wax carving with layers of liquid latex. This took forever! If I put the latex on too thick it would take days to dry. Of course too thin wouldn't make a usable mold. I had to build up about 7 layers to get a durable mold. Later I learned a trick for building up the bulk of the mold with fewer layers. After putting on the first two layers (getting a nice complete coating on the original) I soaked pieces of paper towel in the latex and used it to build up the later layers.

After the mold was made, I used portland cement, sometimes colored with a little black grout mix, to cast my Elder Sign. Then I would paint it with a black wash (acrylic paint thinned with water) to deepen the color, and then a wash of bright green to give it a nice moldy patina.

I also ventured out into other designs. I made a nice "Eye of Azathoth", a "Star Squid", and a "Seal of Cthigla", all my own creations. Each is about 4 inches in diameter. They look very old and authentic and have a nice stone like feel to them. I have sold a few on eBay, and they are available as prizes from Rogue Cthulhu. Once the original is carved (which for me is a very long process), and the mold is made, they are very fast and easy to cast. They make nice soap molds too!

Glass Votive Holders

I love my Dremel tool! It was probably the best investment I have ever made, as far as my crafting tools goes. The first thing I tried to do with my Dremel tool was to etch/engrave on glass.

I used a round tipped diamond bit and actually ground down pretty deep into the glass. It's more engraved than etched. The glass is a cheap votive holder I got from Pat Catan's (a local craft supply store). I printed out a copy of the design shrunk down to size and taped it in place on the inside of the glass. Then I just traced it on the outside with the grinder. Tedious and unforgiving, but not particularly difficult.

I made several with Elder Signs and Yellow Signs. I sold them on eBay several years ago. I haven't made any recently.
They also make nice shot glasses!

My Pet Shoggoth

This fun little project went through several incarnations before I ended up with a product that I liked.

The first design was basically a black water balloon with googly eyes and rubber fishing worms (cut in half) glued to it. It looked great and rolled even better (I couldn't roll it without making a gibbering sound, sort of reminiscent of the hamburgler!). However, the latex of the balloon didn't hold up over time. Within a a few days it would get weak and burst. They were also very labor intensive to make.

Then I found these little rubber tentacle covered balls at a dollar store. They even light up when you squeeze them! I just cut off a few of the tentacles and replaced them with googly eyes, and voila - instant baby shoggoth! I packaged them in netting and created a new hang-card for them. They are available as prizes from Rogue Cthulhu.

Cthulhu Snowman Sculpture

This was my first attempt at sculpting (unless you count those clay ashtrays everyone makes in 1st grade). It dates back to about 2001. It is supposed to be a statue of Cthulhu, but it looks more like a cthulhu-esque snowman to me.

It stands about 4 inches tall and was made with white Sculpy over an aluminum foil core. The eyes are red tipped glass head straight pins. The arms and legs are just simple rolled tentacles, basically because I was/am not a good enough sculptor to make anything better. I do like the way the mouth tentacles came out though. I think they give the face a lot of character.

I never have gotten around to painting it. Mostly because I'm afraid of doing a bad job and screwing up an otherwise decent little sculpture. I'll get around to it someday. Until then, I just use photoshop filters to see how it may look with a different finish :)

Twelve Steps to Sanity

I have been crafting in one form or another for quite some time. Starting back when I was about 11 years old , I designed my own t-shirts, which I used to paint by hand. But this "Arkham Outpatient Program" pin was one of the first items I made for my gaming group, Rogue Cthulhu, back in 1999, and it is still one of my favorites. It is a take on the tokens given out by modern support groups and "12 step" programs as members reach certain milestones in their "recovery". The step number was kept small to indicate that the wearer was still a long way from being sane.
.
The design for this pin was laid out using Corel Draw and was made into a wearable badge with a pin backing with a hand press by "Badge A Minute". Several dozen of these pins have been distributed through Rogue Cthulhu at the Origins Game Fair and through eBay sales (I used to ship one with a copy of a Certificate of Completion from Arkham Sanitarium). This design has also been available on tote-bags and other items via Rogue Cthulhu's CafePress store.

Hello World

For several years now, I have been dabbling in crafting props and fantasy items. I am far from proficient, but my work shows improvement and I really enjoy doing it. Inspired by the numerous blogs and webpages of crafters and prop makers that I visit frequently, and which fill me with a myriad of ideas and inspiration for making my own creations, I have decided to document some of my projects for others to enjoy and hopefully be inspired.

-MRX