I love goggles. I was wearing welding goggles for sun glasses back in 1989; way before Steampunk fashion became all the rage. Of course, all my friends thought I looked retarded, but back then I made a lot of unique fashion choices, and I never cared much about other people's opinions (ask me about my 20ft. long hand knitted Dr. Who scarf some time). Well, now that the rest of the world has caught up to my taste in retro-tech style (i.e. steampunk), I don't feel quite so alone anymore.
As you can see by the title of this post, these are my second set of steampunk goggles. The Mk I version was started a month or two ago, and was put aside and has yet to be finished. Partly because I needed parts for the next step in its construction, and partly because I wasn't entirely happy with the way they were turning out. I'll post them when I finish them, but in the mean time, I have already begun work on the Mk II version, and already I am much more pleased with the results.


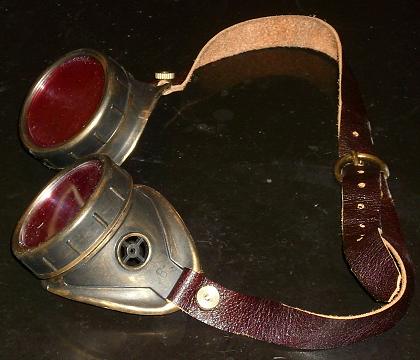
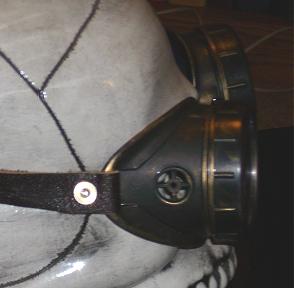
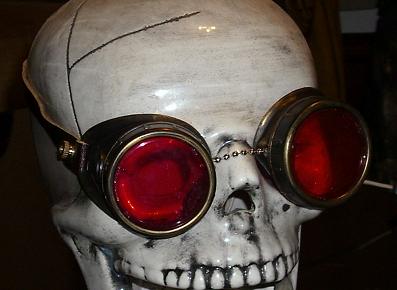
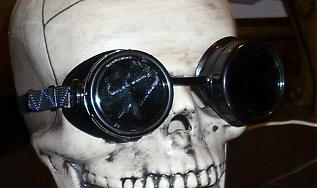
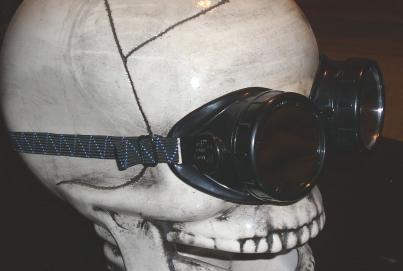
These started out as glossy black plastic, cup style welding goggles that I purchased on eBay for about $5. So far I have actually done very little to them, but they're looking very nice. I took them apart, and removed the side vent covers. Then I sanded them a little and gave them a quick coat of flat black spray paint. Then I got to work with the gold Rub-n-Buff. This is weird stuff, and difficult to work with. I hated it the first time I tried it, and I tossed it in the paint drawer and resigned myself to having just wasted a few bucks. Then I read an Instructable that gave me a few pointers on it. It takes a bit of practice and patience to get the feel for its application, but I'm getting better with it, and when it goes right, it looks fantastic. An hour or so of patient rubbing, and I ended up with an antiqued brass-like finish that is 10x more convincing than any of my paints I had been using up until now. Tedious, but worth it. I still have some more to do on them. I want to brighten them up a bit more.

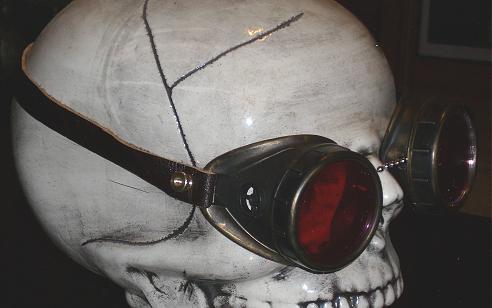
After applying the finish to the main part of the goggles, I removed the dark glass lenses. They were too dark for what I wanted, and I wanted to try a different color. I kept the clear plastic lenses, and cut some clear plastic sheet to match. Then I sandwiched a piece of red cellophane in between the two layers of plastic for each lens. This is just temporary, as something about this arrangement is adding a lot of blur, making them unpleasant to wear. I'll work out a better optics system as the project progresses.

I completely ditched the elastic band and decided to make a leather one from scratch. This is, so far, the most actual modding I have done to these goggles. I cut a strip of ox-blood red leather off of one of my hides (I like to keep several leather hides around. I like leather). I attached the strap to the temples of the goggles using a small screw and a brass... well, I don't know what it's called; some sort of knurled knob. I was going to use a rivet, but I only had silver ones. Then I was going to use a brass snap, but the bright brass looked odd next to the faux finish. These stick out a little and add some steampunk flare without being overpowering. I'll likely add some more odd bits to punk them up a bit more. They are also a bright(ish) brass, but they don't look as out of place as the snap did. I used an antiqued brass buckle that I just picked up the other day at the craft store (something that had been holding me back from finishing the Mk I goggles). It matches the faux finish rather well. Since this is the first time I tried to make a strap like this, I wasn't sure if it would wear well, so I wanted to keep all the parts removable, if possible. That's why I also decided to use a screw and brass nut to attach the buckle as well. I made a couple of leather collars to hold back the excess belt length after buckling, and a leather collar for the nose bridge, but they are not in the pictures because I took them before the glue was dry for those parts, and I'm too lazy to take them over again.

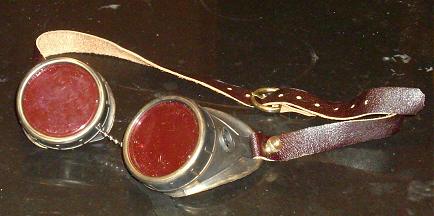
These pictures kind of suck. The lighting in my house is not conducive to picture taking at night. I have included a couple of shots of the original goggles to show how they started out. I still plan to make a few more modifications on these. When I do I will post final pictures, along with the Mk I, which should be done any time now.
UPDATE: While I had intended to make more modifications to these goggles, I never did get around to it. I couldn't figure out what to do next. Now, that point is moot. They have been sold as-is. Oh well. The Mk. I has seen a little progress, but is still not finished. I have put goggles aside for the moment and moved on to other projects. I will be back to them eventually. I still have more that I want to do.


Sir you are an artist. I love the books and the guns. Great detail.
ReplyDeletewow these are damn awesome!
ReplyDeleteI liked these so much I decided to do my own. I pulled out a pair of my grandfather's old welding goggles that I took from his basement and cleaned them up. I'm going to keep the glass, because its real glass and its emerald green, and I'll probably spray paint the outside chrome. Just wanted you to know you inspired me.
ReplyDeleteThank you. That's very good to hear. It always makes me feel good to know that my work is appreciated, and even more so that it has inspired someone. I hope yours come out well for you.
ReplyDelete