Sunday, September 11, 2011

Bicorn Hat, Swords and Accessories

I did a lot of props and costume pieces for my larp at this year's Origins (Aethernauts: The Space Between - Steampunk Edition), one of which was the Steampunk Phonograph, which I posted about earlier, and another was the Space/Diving Helmet which was a major build that I will be posting more about soon. But I also did some smaller items. In hindsight, I wish I had spent a little less time on the props and costume pieces and a little more time on some other elements, but all in all the game ran pretty well. 

Many of the characters in this larp were Victorian era military officers, so I made some uniform pieces and accessories for them. First lets look at the simplest of the items. This is a plastic toy spyglass that I found at a discount store for about a buck. I made quick white canvas belts with brass buckles for the officers out of some old canvas webbing I had. I wanted accessories to match, so I made a spyglass holder out of a cardboard mailing tube wrapped in white butcher paper. The belt loop is chip board wrapped in white paper. It was attached to the tube with some glue and a heavy duty stapler.


Next up is this pistol holster. I had planned to make a steampunk rifle, but I didn't have the time. Instead, I decided to use my Nerf Maverick with the Steampunk paint job (the one pictured is not painted, it was just for test fitting). I wanted the body of the holster to be soft and flexible so that it wouldn't scratch the paint on the gun, so I used a sheet of white craft foam. This I glued into a cylinder, and added a belt loop made out of chipboard in the same manner as the spyglass holder. I made sure the cardboard for the belt loop ran the full length of the holster to give it more form and strength.


A very simple and inexpensive costume piece that easily differentiated the military personnel from the other characters, without having to create full uniforms, was to create rank insignia epaulets. These were made from just a piece of rectangular chipboard covered in black cloth. I then glued on strips of gold knotted trim and bits of ribbon from the fabric store. These would then be stuck onto the player's shoulders with a bit of double sided tape.


The epaulets I made for the retired Major-General were a little more complicated, but similar. I used a bit of gold satin fringe sandwiched between two pieces of chipboard (one slightly larger than the other). These ones were round on the ends to create the shoulder cup style of epaulet. The chipboard was sealed with mod podge and painted gold. The fringe was arranged around the cup and glued down to the larger piece. Then the smaller piece was used to cover this. The upper (smaller) piece also had some black ribbon added for additional decoration. None of these look very much like actual rank insignia from any country or period, but my project did not require period accuracy. They were only meant to convey the idea of a military uniform on a non-existent budget.


Some of the military officers was also given an officer's sword. I wanted these to be very cheap and simple. They turned out to be a little more complicated to make than I expected, but they looked pretty decent. After looking around the shop for a few minutes, I found a few pieces of wood trim that would work nicely. They weren't all exactly the same size, but oh well. I cut them all to the same length and trimmed down around the handle so that a piece of 3/4" pvc pipe would fit over the end. The pvc would serve as my handle. I wouldn't have to wrap or paint it, since I was going with a white trim theme. It would look like an ivory handle. I shaved down the tips into a rough point so that it seemed more sword-like, but I left the edges flat and made sure the points were quite dull so that no one would get hurt. The convention actually has rules against using these kinds of props in games, for safety reasons, but as long as no one gets hurt, they are seldom enforced.

I created a paper template for the hand guard and traced it out onto chipboard. This was then sealed with mod podge and spray painted gold and slid over the end of the handle. The blades were primed and painted with silver. Some glue and an upholstery nail at the pommel held the hand guard in place.


The scabbards were made from corrugated cardboard folded into a box that would fit around the blade. I left both ends open for simplicity. I wrapped the whole thing in masking tape and painted it gloss black. What really sold it as a scabbard was the piece of red ribbon trim that I glued down the side as an accent. I created belt hangers out of painted chipboard and a brass rivet. Chipboard wasn't really strong enough for this, and most of the belt hangers ended up broken by the end of the game, but they were only needed for the one event. The whole thing was topped off with some decorative cord tassels.


 The most difficult of the military costume pieces was the bicorn hat, that I had originally intended for the ship's Captain, but ended up giving to the retired Major-General. I had to do a little digging on the internet for ideas on how to make the hat. Most helpful was posting on the Replica Prop Forum where I found out the proper name for such a thing, which then led me in the right direction to finding reference images and such.

Again, this needed to be done on the super-cheap, so back to my good old friend, chipboard. At $1.75 a sheet, it is hard to beat. I sketched out a rough circle on the chipboard, and at the center of it I cut out an oval with measurements that roughly matched the dimensions of my head. I made it a little tight on purpose, figuring it is easy to remove material, not so easy to put it back.


Next came the shaping of the chipboard. This was harder than I thought it would be. It took several days of pushing and prodding and pinning with clips and clothes pins to get it to where I wanted it. The best work was done after I realized that the chipboard would form well after it was wetted down with a misting of water. That made it easier to bend without creasing, and it allowed the board to mold to the desired shape and stay there after it dried.


After shaping, I needed to cover the chipboard with something. I was hoping to find some sort of spray on flocking material to give it a cloth like texture, but I was unable to find anything like that locally. I briefly considered just spray painting it, but ultimately decided to just cover the thing with cloth. Fortunately, I had stocked up on cheap black cotton cloth back when Wal-Mart had a fabric department. I applied the cloth with spray glue and was careful to avoid wrinkles.


After realizing that you could see the glare form my bald head through the hole in the front during a test fitting, I added a swath of black cloth loosely across the head opening, to prevent this. 


As the final detail, I added a trim of fake white fur all around the edges. I considered some sort of ribbon or decoration on the side too, but decided not to. The two sides of the hat was then closed up with a few pieces of double sided foam tape.


Here is a pic from the larp so you can see some of the props in action. More pics from the larp will be posted on RogueCthulhu.com (eventually).


Monday, September 5, 2011

Good News / Bad News

So, the good news is, that after three years of being laid off from work, I have finally secured a steady day job that will let me catch up on some long over due bills. The bad news is, that I am now working 60 hours a week at said new job, which leaves me very little time to work on any projects or make any blog posts. I haven't even managed to list the three Cthulhu books from my last post on eBay yet.

Furthermore, I was pretty scared there for the first few weeks. My new job is very physical, and it has taken a toll on my hands. Practically overnight I developed near crippling arthritis in both hands. OK, maybe more like moderate arthritis, but it sure felt crippling. Pain all the time, can't move my fingers in the mornings, loss of sensation and loss of fine motor control. Just holding a hobby knife was near impossible. Any kind of crafting was right out. Since then it has gotten better, most of the pain is gone and I have regained some sensation and a good bit of motor control, but I'm still suffering from severe joint stiffness in my fingers. Every morning I take three Advil and soak in hot water for 10 minutes just to get them moving so that I can get dressed.

So that's why there have been no new posts in the past month. I still have a lot of material to post from my Origins prop projects, even if I can't get much done in the workshop for now. So during one of the four hours I have to myself each day, I will try to get some of it posted soon.

Sunday, July 17, 2011

New Cthulhu Cycle Books

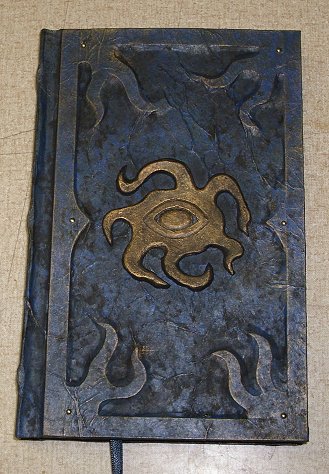
I have just finished a set of three Cthulhu Cycle re-covers that I am about to put up for sale on eBay. For those of you who don't know, I make custom hard covers for trade paperback books. I frequently re-cover Cthulhu fiction books published by Chaosium. I have a particular style that I use for these books. The three posted here differ only in that I have chosen to use cast resin pieces for the front cover centerpieces, instead of the usual chipboard glyph centerpiece. I also added some "grunge" to the recesses to give it more depth. Oh, and normally I highlight with gold, but this is the first time I have tried green and copper on one of these books.


These books will be sold individually. They have not yet been posted to eBay, but they will be shortly. You can find them with the link over in the right column to my Rogue Cthulhu eBay page.

UPDATE:  Three years later, and I still have not posted these books on eBay! Oh well. I did just post a new book binding tutorial that describes one of the new techniques I used when making these books; the double end paper hack, as one commenter called it. You can see that post here.

Sunday, July 3, 2011

Steampunk Phonograph (pt.4)

I'm back. Origins is finally over and I'm still working on putting my stuff away from the trip, but I have a few minutes to post about some of the new props that I took with me.

The Steampunk Phonograph build was shaping up and nearing completion when I last posted. With the pipe work sorted out and the horn nearly complete, by next big hurdle was the optics. I had decided in the early stages that I wanted to use a laser pointer instead of a traditional stylus. Now I just had to find a way to make one fit. I started by tearing apart a laser pointer to see what I had to work with.


It was harder than I thought. The body of the mechanism and the lens are fused to the casing. I had to cut down the casing with a Dremel to get at the circuit board. Then I de-soldered the momentary contact switch and removed it from the board so I could implement my own switching mechanism. I even had to trim dowm the board a bit to fit the whole thing inside a copper elbow for mounting.

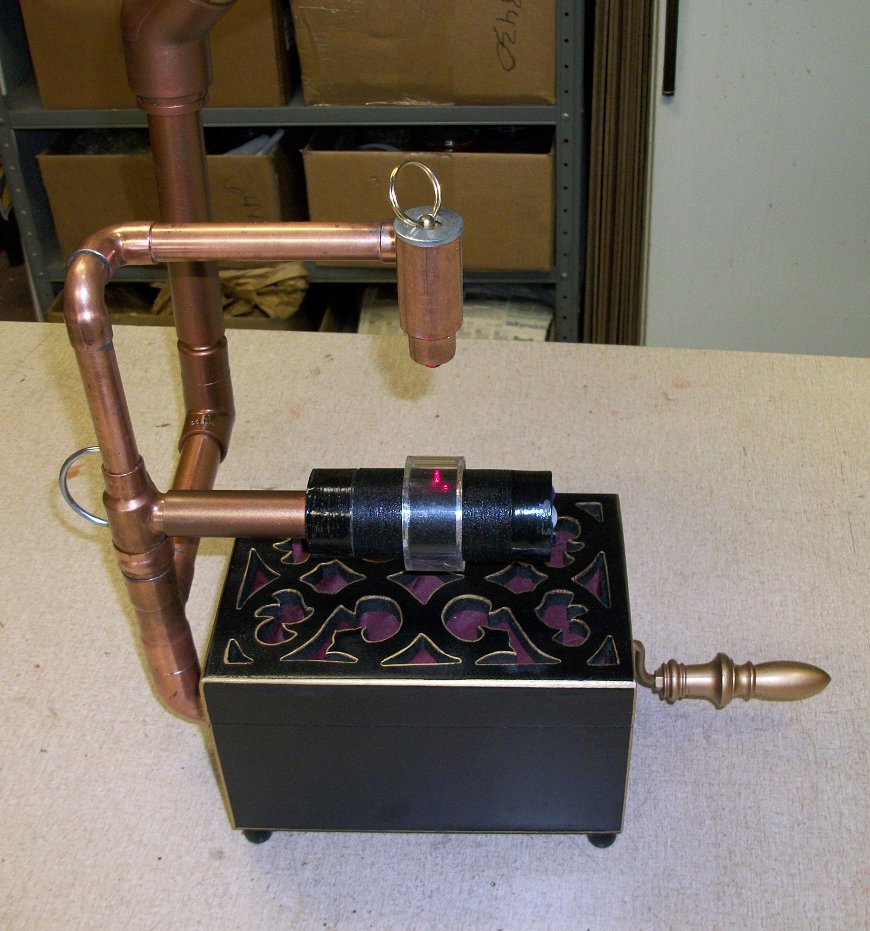
Then, something happened. I stumbled upon a completely mechanical solution, that didn't require any rewiring or dissassembly of the laser pointer (a new one, obviously), and it even looked better than my original plan. A half inch copper pipe fit over the body of the pointer perfectly, and with just crimping the pipe into a slightly oblong shape, twisting the pointer inside the pipe would depress the switch and hold it down. Also, the whole pointer assembly fit perfectly inside a reducer T, and it even looked cool. All I had to do was cut a sleeve of pipe and crimp it, then jam that sleeve inside the reducer T. I had a fender washer that fit the end of the reducer T perfectly, and would keep the pointer in place. The tiny nub where the keychain attaches to the end of the pointer stuck up past the fender washer, which made it perfect for threading a split ring through. The split ring would help to keep the pointer in the right position and also serve as the "switch". By turning the split ring, the whole pointer would turn inside the sleeve and depress the switch. Turn it a little more, and it would turn off. By attaching the fender washer to the reducer T with super glue, I could remove the pointer from the assembly at any time to replace the batteries.


 The body of the phonograph was given a black lacquered finish, just like the horn. I used a gold leafing paint pen to trim the edges.


The last piece of the puzzle was the spindle arm, which I had already started a while back. I had originally wanted to make it so that the spindle arm rotated as it played, but that seemed impractical on my time table. It would just have to be stationary. I started with a length of pvc pipe which, coincidentally, fit perfectly onto the end of a copper reducer T. I needed to build up the pipe to the diameter of the cylinder tube, giving it enough of a snug fit that it would hold in place, but not so snug that it would be hard to change tubes. I glued foam padding to the pvc pipe.


Then I covered the foam in velvet cloth. I sewed the velvet into a sleeve and pulled it over the foam. One end of the tube of cloth got glued down to meet the pipe. The other end got tucked into the end of the pipe. a white glass marble fit perfectly into the end of the pipe with the cloth tucked in. It was a nice snug fit. The marble would serve as a decorative piece, and to hold the cloth in place.


I had also decided early on that I wanted a sort of "floating"  acrylic ring around the cylinder The laser would shine through the ring, as sort of a lens. I'm not really sure why, I wanted it, I just thought it would look neat, and kind of futuristic. It sold the idea of a laser stylus better than just having the laser hitting the bare surface of the cylinder, imho.

Mounting the acrylic ring so that it seemed to float over the cylinder was a bit of a challenge. I pondered several design approaches before settling on a thin metal arm for the ring to be attached to. I had some left over chromed rod from my Steampunk Diving Helmet project that would fit the bill. I cut it to length, and epoxied it to the ring, by carving a small groove in the acrylic with a Dremel. This gave the epoxy more to grab hold of. Then I attached the rod to one of the reducer Ts with a copper strap and more epoxy. I kept the spacing constant by using chipboard shims until the epoxy was dry.


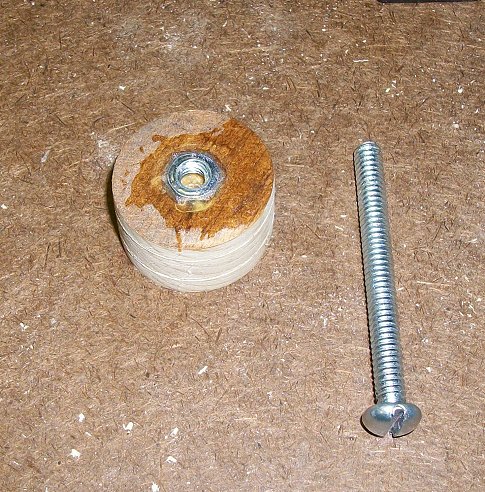
My plan to use the screw and washer assembly to mount the horn to the pipe-works needed a little fine tuning. First it needed a longer screw, and a slightly different selection of washers.


Then I needed to cut a custom wooden plug that would fit snugly inside the pvc elbow. I got as close as I could to the right diameter with my hole cutting drill bit (for cutting holes in doors for lock assemblies). Then I had to improvise a power sander using a sanding block and a drill press to shave it down to the perfect size.


Once it was the perfect diameter, I had to make countersinks on each side for the nuts, one that would be epoxied to this piece and one that would remain on the screw, holding the washer assembly together on the horn.


Then the plug was epoxied to the inside of the pvc elbow. After it was dry, I could unscrew the elbow from the horn, without affecting the washer assembly, allowing for easier storage and transport.


The last detail to be completed before final assembly was the speaker grill and sound system. I bought a small battery powered speaker set from a discount store for $1.50. It is designed to be used with mp3 players. I also picked up a simple mp3 player for about $20. Both would fit inside the body of the phonograph, or, to eliminate having to open the lid to change the song, I could put the mp3 player underneath the body, attaching the wire through a hold in the bottom, and just slide it out to change the song, and then slide it back under again to hide it. I loaded up the mp3 player with some classical music for the LARP, but it can play anything.


The speakers would be hidden by the fretwork on the lid, which would also let the sound come through. It is a little muffled, but still audible. To completely hide the inner workings, I added a thin piece of satin fabric to the underside of the lid, held in place by a piece of foamcore.


A word about the pipe-works; The majority of it is made form copper plumbing pipe. Some of it is made from pvc pipe and painted to match. Marching the color was hard. Copper has a wide range of colors, from pinkish, to dark orange-brown. Just to make the copper pieces all match each other, I had to wash them in HCL acid and scrub them with a scotch brite pad. Then when they reached the color I wanted, I sprayed them with clear coat to prevent further oxidation. Then I had to use several enamel and acrylic paints to get the pvc to match it. I got as close as I could. I have about a half dozen "copper" paints, but none of them ever seem to look like real copper.


Some of the pipes were soldered together, and some were not. This allows for disassembly for transport and storage, as well as some room for adjustments to the position of the horn, cylinder and stylus arms. I also needed to be able to swing the stylus and cylinder arms away to open the lid of the body and get to the speakers and mp3 player. I learned the hard way to swing them forward, not back, or the whole thing will be rear-heavy and tip backwards.

That's pretty much it for construction. This build was complicated in so far as it had a lot of little technical details to be tackled. But it was far easier than the Steampunk Diving Helmet project. It would have been harder if I had not used a pre-fab box as the body.

Here are some glamor shots of the finished assembly. BTW, I did end up putting the wire grill in the horn during the show, but it looks just as good without it. Some of the pics here show it with and some show it without.


 See also:

Steampunk Phonograph (pt.1)
Steampunk Phonograph (pt.2)
Steampunk Phonograph (pt.3) 
Phonograph Prop Redux