Saturday, August 5, 2017

Free Wood

For a little while now, I have had an add on Craig's List (off and on) asking for any hardwood scraps anyone wants to get rid of, so that I can practice wood turning without wasting money buying decent wood to turn. I think we have sufficiently established that I am cheap. Anyway, several people have responded to that add, and as a result, I have ended up with quite a collection of  hardwood logs from tree trimmings. Some of them I can just square up the ends and put them on the lathe, but most are much too big.

My first load of logs was of Ash. They are the ones way at the bottom of the pile, with painted ends. Many of them were small enough that I could turn them on the lathe without any other processing. But some would need to be cut in half on the band saw and then made into bowl blanks. Because they needed minimal processing, and there didn't seem like that many of them, I was in no hurry to do much with them. So, I just stacked them up by my shed to let them dry out. I did paint the end grain to try to cut down on checking.

Next came a much bigger haul of Ailanthus (Tree of Heaven). Those are the ones on the right side of the pile. This wood was very green. It had only been cut a few days before. Ailanthus is not a particularly attractive wood, and it is known for splitting badly as it dries. So there is a very good chance most of this wood will be just for practice. We'll see. Still, free wood is free wood. I had never really dealt with storing logs for turning, so I watched a few YouTube videos and they told me that as soon as possible, I needed to split the wood in half to prevent splitting from tangential shrinkage. I did what I could on the band saw, but most of the logs were far too big, so I had to acquaint myself with the usage of a chain saw.
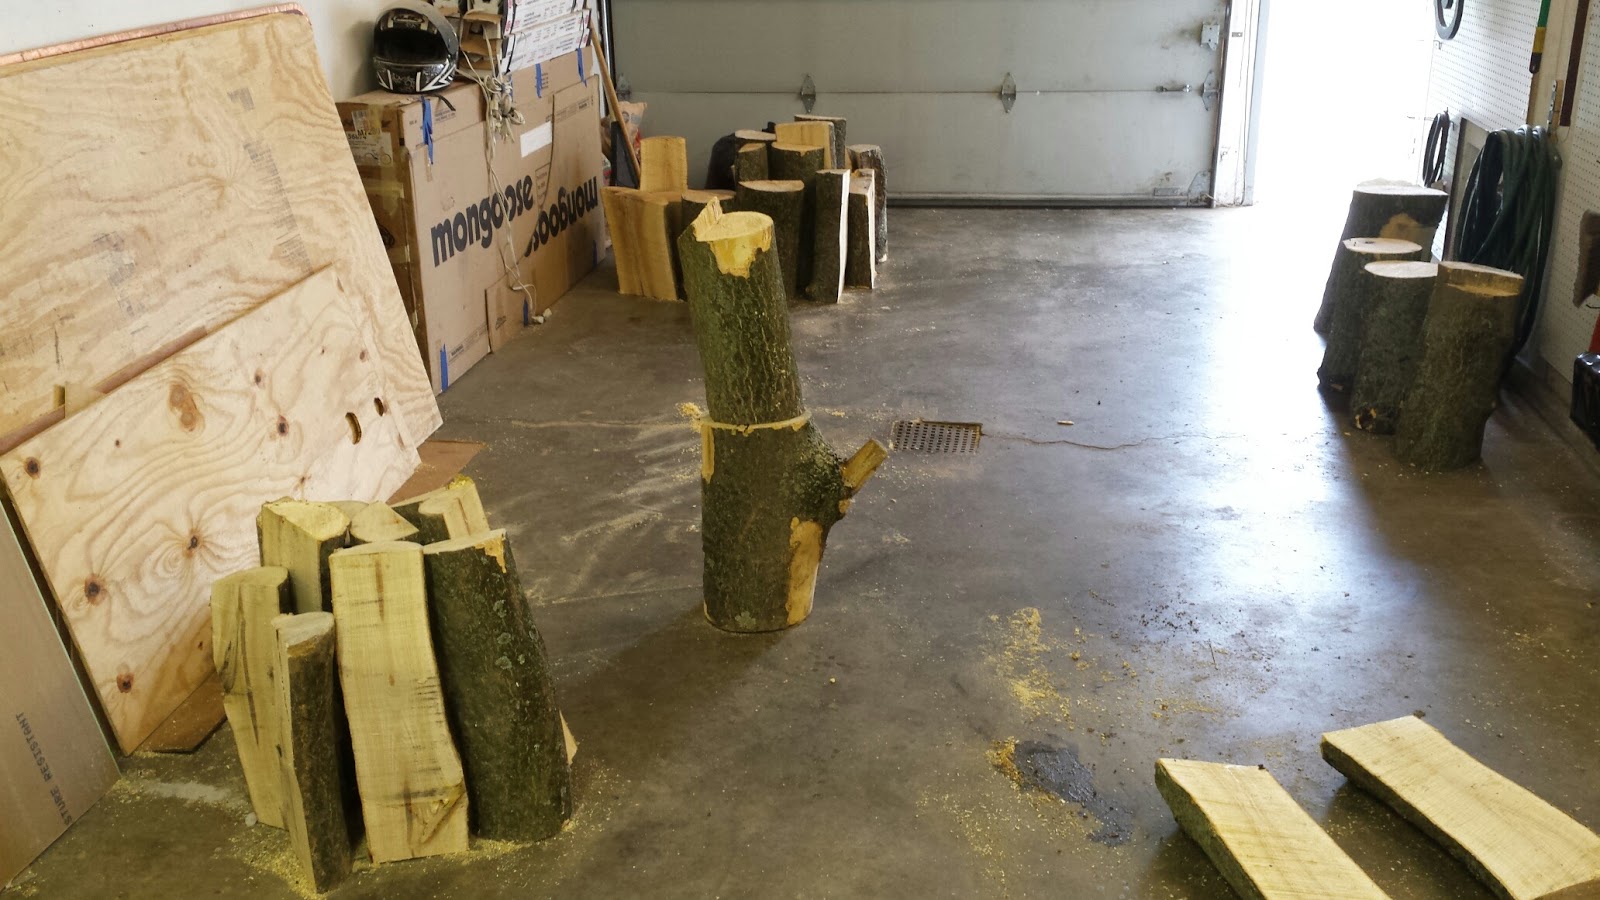
After splitting them, I coated the end grain with melted wax. Those are the ones in the first picture that you see split and with white ends, on the right side.

I started rough turning bowl blanks out of some of them (which I shall have a video of sometime in the future), but didn't get far before I got distracted by another offer of free wood. This time, it was a beautiful haul of aged cherry!
The cherry logs are the ones with the dark ends, sort of in the middle of the stack, on the left, in the first picture. These logs were about a year old already, but had been stored out in the weather, so the inner bark was already completely rotted away. The outer bark practically fell off in my hands. So, I debarked all of them, in hopes that drying them out some would kill the fungus before it rotted the wood too badly.

When I got the bark off of one particular piece, I saw something very exciting. This undulation in the wood is caused by the wood fibers being under compression as the tree grows (usually because of the weight of a heavy limb). In woodworking it creates what is called compression figure, or curl. It causes the wood grain to take on a tiger stripe like chatoyance, which is highly prized.

 Very shortly after acquiring the cherry logs, I found a deal on Craig's List for a Harbor Freight 12" planer that I couldn't pass up.

 Having a planer opens up new possibilities for me. For one, it will allow me to properly mill up some of these logs into cants and boards, not just bowl blanks and staves. Step one, however, was still to try to trim them down on the band saw. This time, I tried just slicing off the edge to get a flat surface.
 Then I would keep trimming until I could fit the width of the log under the band saw and cut off 2" slabs.
 Then I ran the slabs through the planer, flattening and smoothing out the two faces. This took many, many passes. If I had a working jointer (I need my blades changed), I would have flattened one side with the jointer first, then planed the other side to be parallel. Since I didn't, I just ran the slabs through the planer, one side then the other, over and over, hoping they would eventually flatten out and work their way to becoming parallel with each other. I think it worked.

These were the first boards I have ever milled. I think they look awesome. They are a little over 2" thick, which is plenty for just about any project I can think I would use them for. I can rip them down into 2x2 spindle blanks for the lathe, or I can resaw them into thinner boards for other woodworking projects.  For now, I will just stack them and let them dry out some more. I plan to do this with most of the cherry logs. I will use just a few for bowl blanks and mill the rest.

Having never used a planer before, I did not know how fast they create shavings. I had mine hooked up to a large Ridgid shop vacuum, and after planing maybe six or so boards, the planer started acting funny, spitting shavings out the front and not cutting smoothly. I checked the vacuum and this is what I found!

 I was just getting rolling with processing the cherry logs when another Craig's List opportunity came along. This time, is was a large cache of Elm.

 The elm logs are the large un-split ones on top of the cherry, and on the ground, and on top of the Ailanthus in the first pic. I managed to mill up boards out of two or three of the elm, and cherry logs, and I've cut a few of the ailanthus into bowl blanks. There's a lot more than what is shown here. The cherry boards I think look particularly good. They have some nice color to them already. I am, however, having a problem with mold growth on the faces of the boards as they are stacked to dry. I'm working on that.

This process is seriously taxing my band saws, and my patience. It is kind of fun but it is also frustrating and tedious (and dangerous). To try to make straighter cuts and help keep the irregularly shaped logs oriented while they go through the band saw, I built a simple sled. It has a rail on the bottom that goes in the miter track on the band saw table. It has a back stop and a side wall to rest the log against. I can run screws through either the side wall or the back stop (or even up through the floor of the sled) in order to keep the log in place.

 As you can see from the pics, I use 2x4s as spacers between the log and the side wall. This is how I position the log, in respect to the blade, for each cut. After each cut, I can just add another 2x4 spacer between the side wall and the log and that will set me up to cut off another 1.5" slab. I built the sled a little too wide. I end up using a spacer even at the beginning. Any log that would fit up against the side wall without a spacer would be too big for the resaw capacity of my band saw.

I did figure out a trick that can give me just a little bit more capacity for those awkward initial cuts where I'm trying to make the round log more square. I can tilt the saw table up to 45 degrees to allow me some more clearance for cutting off the round edge of a log. The rail on the bottom of the sled will help hold everything on the table without slipping.

Still, my band saws are not really up to this task. If I intend to continue doing log milling I think I am going to have to build some kind of chainsaw mill. But that's a project for another post ;)

 I've been collecting wood, recently, faster than I can process it, so I think I will have to slow it down for a bit. I am running out of room on my wood pile anyway. And now I have LOTS of milling splitting and rough turning to do in order to process what I already have.

Still,... free wood!

Wednesday, July 26, 2017

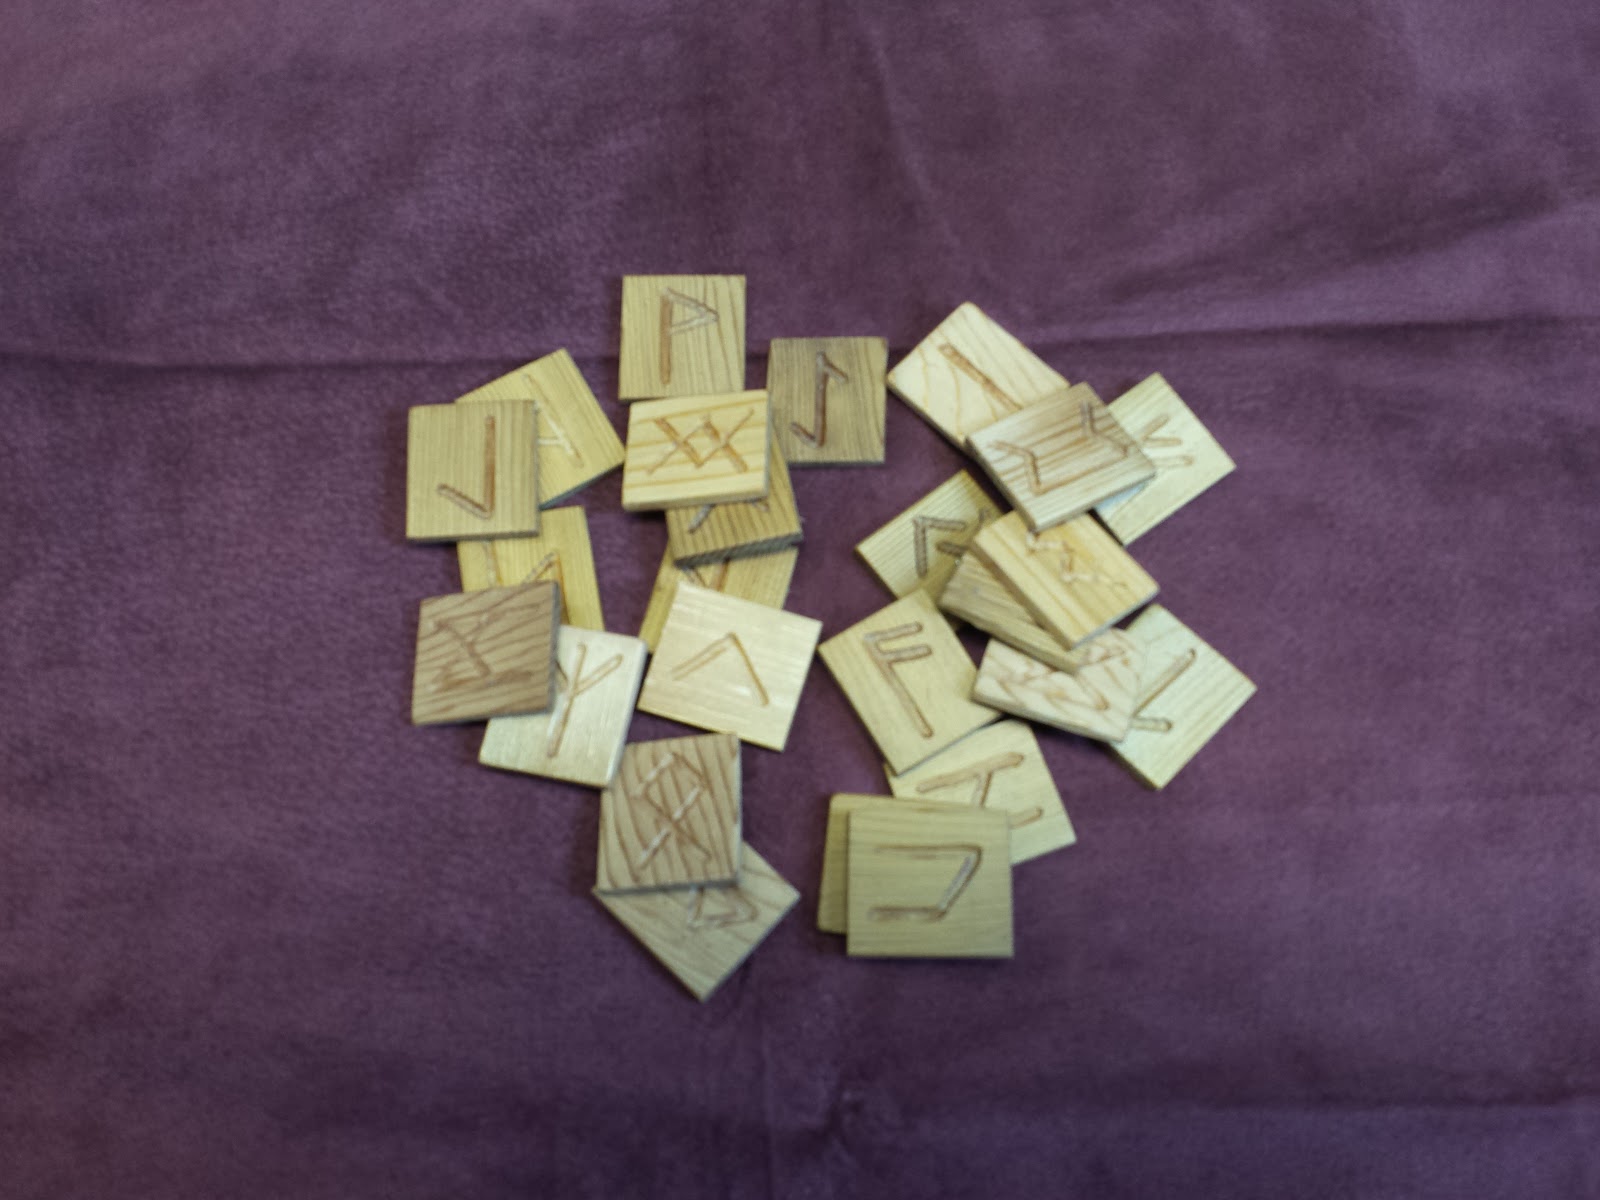
Runes, runes, runes.

Runes are another form of divination, which draws its roots from ancient Norse tradition. The runes have a long and interesting history, so if you are interested in divination, or Norse mythology, or history, or if you just have some time to kill, I recommend you do some reading on them.

I've made several sets of runes in the past, but never documented them. My recent interest in wood turning has introduced me to more exotic wood than I had ever previously worked with, and thought that they wood make for some lovely run sets.

 Above is a set made from black walnut. Below, is a set made from cedar.

 I also made sets from purple heart, genuine mahogany, and some random hardwood chits I got from the craft store. These are not glamour shots by any stretch of the imagination. They are just pics I snapped as an afterthought while I was making them.
Here is a little better picture of them in the case at the store, alongside some stone rune sets that are commercially produced.

And speaking of stone rune sets, I also made a couple of sets from river rock. I made several river rock sets, with different colored inking, but aside from the color of the symbol, they look pretty much the same, so just the one pic should suffice.

 All of the above runes were engraved with a dremel tool, and then inked. The stone sets were inked with acrylic paint. The wood sets were inked with a sharpie marker (except the cedar set, which I did not ink) and then finished with three coats of tung oil.

But one of my favorite sets was neither engraved nor inked.  They are printed.
I have a set of tarot cards that I sell at the store, which has the meanings of the cards printed right on the face, so beginners can learn them without having to look them up in a book every time. So I thought, why not do that with runes too?

So, some years ago, I did a layout on the computer with all of the runes, their names, their translation, and their divinitory meanings. I sized them to fit onto wooden chits (about 2 inches square) that I found at the craft store. The chits were stained black with wood stain. The runes were printed out on a laser printer and stained brown with coffee/tea to give them an aged appearance. Then I used a water tearing technique to separate the runes and give them a deckled edge.
Then I glued the paper to the wooden tile and gave both sides two coats of semi-gloss oil based polyurethane.

This is the same effect that I used for my pendulum boards, and that I will use on my some-day-to-be ouija board (though not the Ouija board previously featured). If you attempt to replicate this finish, it is important to note that you must use oil based polyurethane. The water based polycrylic will not soak into and darken the paper, giving it an aged and warm hue. Instead it will make the surface look plastic and cheap.
I don't know if I am the first person to make beginner runes like these, but I have never seen them anywhere. I'm rather proud of them, and think they would make a great tool for learning the runes.

As I progress with my wood turning and wood working, I now have more exotic woods to choose from, so I'll almost certainly be making more wooden rune sets in the near future.
.

Monday, July 17, 2017

Triquetra Table with Roses

Some consumers, such as pagans, wiccans and occult enthusiasts, are under served by the mainstream manufacturing community. It can be very difficult for someone with interest in those subcultures to find commercially available items for ritual use, home decoration , or even basic functional items that are made in a style that reflects the aesthetic of their chosen life path. Which is to say- it can be hard to find things with pentagrams on them. It is especially difficult in an area like mine, which is not particularly liberal or tolerant of non-christian cultures. Before the internet, there were a handful of mail order houses you could turn to, and other than that, you were on your own to make whatever you needed. That is why I spend a lot of my time scouring the marketplace for items with "up-cycling" potential. I look for things I can buy cheaply and then modify them to appeal to a more niche market.

Take this nice oak veneer end table, for example. I found this at a discount store for a very good price, and it just screamed out to me to have a big ol' occult symbol emblazoned across it (and then, of course, to be resold for a reasonable profit). Some of the items I up-cycle get substantial modifications. Others, like this table, just need a little paint.

To make these modifications, I first took the top of the table off so that it would be easier to work on. Then I covered the table top with a mask. Sometimes I will use vinyl contact paper, but this time I used masking tape. Some months back, I found a couple of rolls of masking tape that were about 12 inches wide. I had never seen rolls that wide before, so I grabbed them. This looked like the perfect project to try them out.

Next, I selected my design elements. I went with a triquetra for the center of the table, and then roses around the edge. The triquetra I got from a vector image I downloaded online. I printed it out to scale, (which took two pieces of paper that got taped together) and spray glued it to the center of the table, right onto the masking tape.

The roses came from several stencils I had bought from the craft store. Unfortunately, no single stencil gave me the look I was after, so I had to Frankenstein the images together, one piece at a time. I traced the rose images right onto the masking tape with a pencil. I probably should have used a marker. The lines were a little hard to see. But I wasn't sure if I would need to erase. I was making up the layout as I went along.

Then came the laborious and oh so tedious task of cutting the images out with an x-acto knife. Those roses took a LOT of time to cut out. I think I worked on them for about two days.

Once the images were all cut out, I masked off all the roses and painted the triquetra with several light coats of gold spray paint.

When that was dry, I masked off the triquetra, uncovered the roses, and masked off just the flowers themselves, and gave a quick light base coat of white over the stems and leaves before spray painting them green. Again, I waited for that to dry thoroughly before unmasking the flowers, and masking the stems and leaves. Again, I gave the flowers a light base coat of white before spray painting the roses red.

After all the paint was dry, I removed the masking tape from the entire table top and inspected it for errors. I did find one spot where I must have made a mistake cutting the mask. There was paint connecting two parts of a stem that should not have been connected. It was a small area, and luckily, I was able to lightly scrape the paint off with a razor knife without damaging anything. Finally, I put three light coats of spray spar urethane over the whole top.


Most up-cycle paint jobs like this I can do in less than a day, but the intricacy of the roses really ate up some time. I worked on this project for about four days total (including drying time), and I will sell it for about 2-3 times what I paid for it. Which is probably still in line with, or even less than, what someone would have to pay if they found something like this online. Projects like this are really only economically feasible if I can buy the base item at a substantial discount. Unfortunately, that means that most of my up-cycled projects are one-offs, because I find the base items at discount closeout stores, and I won't be able to find more of them at the price I need.


Thursday, July 13, 2017

Saw- 1; Finger- 0

We interrupt our regular scheduled post flow to bring you this breaking update to the score in the tense battle between man and machine. Saw- 1; Finger- 0.

Earlier this evening I was making progress with cutting down some Ailanthus logs into lumber (you will see a post on that in a couple of weeks). Everything was going fine, I was getting things done, and all the while you THINK you are being careful...

And then BAM!, you've cut halfway through your finger on the band saw!

OK, so I put this "after" picture up first, in case any of you are squeamish. So if you are, you can stop now. And so you don't need to read any further down to get the pertinent details, everything is fine, I didn't lose any part of my anatomy. I got five stitches and everything is expected to heal up fine.

Now, scroll down for the gory details...


.

.

.

.keep going...

.

.

a little more...

 .

.


OK, good.

First, lets have a look at our adversary.

 This is my new Ridgid 14" band saw. I got it on Craigslist for $175 about two months ago. I have been using it to cut up logs, that I have also been finding on Craigslist, into usable lumber pieces (more on that in a future post). I was actually making good progress for once, I got a system down and had cut about four logs before the accident. And like I said, I thought I was being safe, but suddenly I felt the blade break through the wood and an odd friction on my little finger and alarm bells started going off in my head. I wasn't even sure what had gone wrong at first, but instinctively, I pulled back and clutched my hand. That's when I saw the blood. Not a lot. Actually, very little blood. Two drops on the workshop floor is all the mess that it made.
Seriously, that's it.
But there was some blood on my hand and I knew I had been cut. It didn't really hurt at first, thankfully. I was even tempted to just wrap it in electrical tape, like I usually do with small cuts, and call it taken care of, but I squeezed the finger tip a little and saw it open up a lot wider than I was comfortable with. It was way too deep to just leave go. I was going to have to get medical attention. Damn it.

So, I ran the finger under the cold tap in the workshop bathroom for a few seconds, and then I wrapped it in a piece of clean paper towel and some vinyl electrical tape, which is my normal bandaging technique.

Then I closed up the workshop, gathered up my car keys, changed my sweat drenched and sawdust covered shirt (because I figured I would be sitting in a waiting room for a while), called StatCare to see if they did stitches or if I would need to use the ER, and drove myself to StatCare. I avoided calling my mother to let her know about the accident until after it was all over, because I knew she would freak out. 

Ok, so now, time for the gruesome pics. The unwrapped, pre-stitches pics.


That wasn't so terrible, now was it. It certainly could have been a lot worse. I feel very lucky that the cut was so minor (though I'm sure I won't feel quite so lucky when the bill comes in). I could easily have lost the tip of my finger.

So here it is all stitched up, pre-bandage.

I didn't even get any pain meds for this little scrimmage. Though they did do an x-ray to make sure I didn't nick the bone.


OK, so the take away here is, be safe around power tools, kids!
It only takes one second to change your life forever.
 I was very fortunate that this accident was fairly minor.

Now, back to our regular programming.