
So, this is my fourth attempt at turning a bowl. I'm doing my best to do everything right. I'm using hardwood, I'm trying to follow good technique. I'm being patient and taking my time.

I started with a big block of 3"x 8"x24" oak cribbing. The surface was really nasty and black, and it has some cupping, so I used a hand plane and my new drum sander to get the two main faces nice and smooth. Then I cut it into two 8"x8"x3" blocks and glued them together along the freshly smoothed face to make an 8"x8"x6" bowl blank. I was surprised at how nice this nasty chunk of wood looked after it was cleaned up and smoothed out.

After the glue was dry, I found the center , scribed a circle with a compass, and used the band saw to rough cut the block into a round blank. Then I drilled a 5/8" hole in the marked center, about 2" deep. Into this hole, I screwed a screw chuck, which I will use to attach the blank to my lathe scroll chuck.
Once the block was chucked up on the screw, the first thing I did was true up the blank, making it nice and round (cylindrical), and squaring off the bottom (the end not attached to the chuck). Then I marked a circle with a pencil, on the bottom, that is the size of my scroll chuck jaws. I carefully cut a mortise in this circle, so that after I finish shaping the outside of the bowl, I can turn the blank around and reverse chuck the blank using this mortise. I take extra care to shape the mortise so that it has the best chance to be held tightly. I have had problems in the past with blanks getting pulled out of the chuck when I get a catch. I think this has been because I did not shape the mortise or tenon (I used a tenon in the past) correctly. I'm hoping my improved technique will help overcome that problem this time.
Then I start shaping the outside of the bowl. This does not go terribly well at first. I get a few bad catches, like before. I get a chunk tore out of the blank that I have to try to fix. So far it's looking like it always does. Then I decide to slow down the lathe, and switch to the carbide scraper, and take very light passes, and things start going a little better. I didn't get any pictures of the early parts of the build, because I expected this to be a test bowl, that would probably fail.
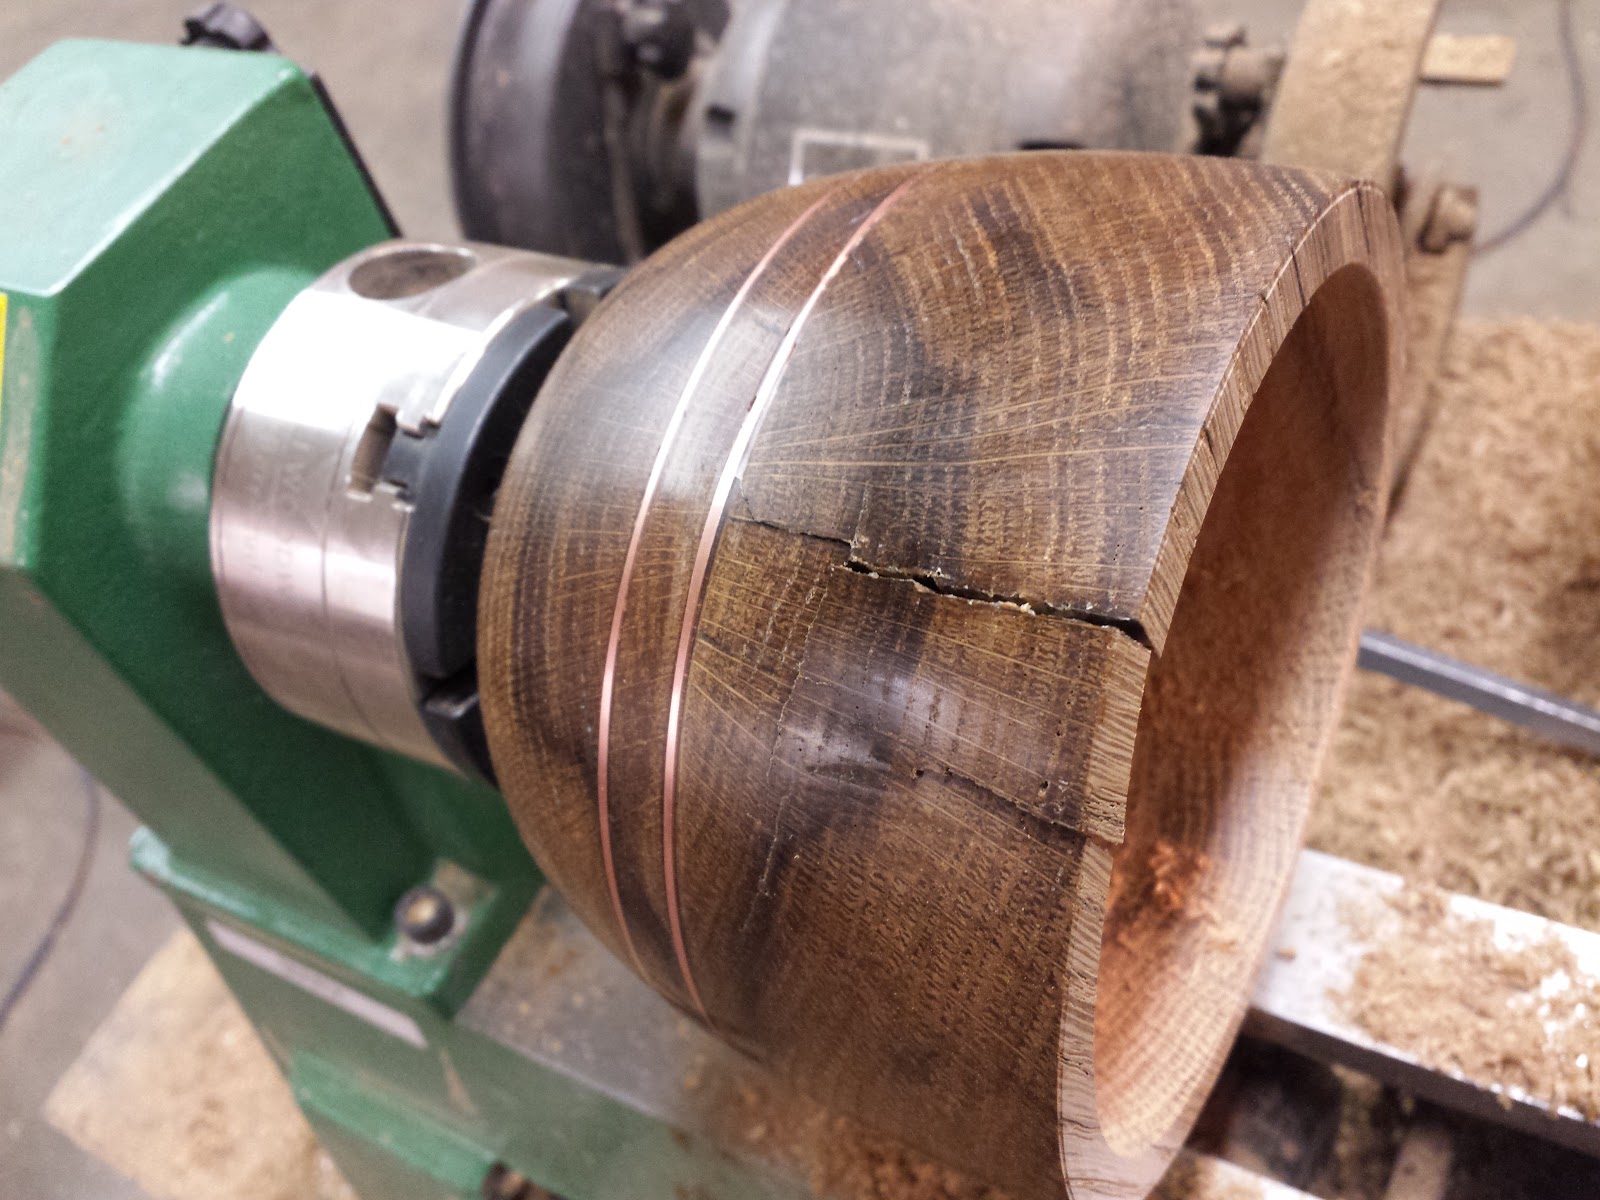
Before long, the bowl started to take shape. But the shape was very boring. Since I sort of expected this bowl to fail, I decide to experiment with a technique that I have seen done, and wanted to try- copper inlay. It's actually quite simple, in theory. I used a detail gouge to turn a small groove around the circumference of the piece. Then I used CA glue to glue a piece of solid copper wire into the groove. Once the glue was set I used a carbide tool to gently scrape the bulk of the excess copper away, then I switched to sand paper. Copper is soft, so it can be turned pretty much like wood. It also sands just like wood. You just sand the piece until the copper wire ends up flush with the surface of the piece. Unfortunately, just as I was about finished, the wire flew off at high speed and stuck me in the stomach. The heat from the sanding had softened the glue.


I decided to try again, this time, using epoxy instead of CA. The epoxy should be less susceptible to the heat buildup. I also put a second groove in, about a half inch from the first. I mixed up some quick set epoxy and spread it over the piece, pushing it into the grooves. Then I used masking tape to help hold the wire in the groove while the epoxy set. I also used electrical tape over top of the masking tape, so that the stretchy-ness of the vinyl tape would add some compression and keep the wire fitted snugly down in the groove.
Once the epoxy was cured, I removed the tape. I slowed the lathe down to lessen the heat, just in case. Then I started sanding down the excess epoxy and the top half of the copper wire. Success! It looked amazing! Now, if I could just finish the inside of the bowl without screwing it up. This is about the point where I started taking pictures. The success of the copper inlay gave me hope that this bowl might not turn out so bad after all.


I finished sanding the outside of the bowl and applied a couple of coats of Shine Juice before un-chucking the piece and turning it around. Then I put he jaws in the mortise and using reverse pressure, snugged them up tight. I had never done a reverse mounting before, so I was hoping for the best.

The next step was to hog out as much material from the inside of the bowl as possible, using a forstner bit. I set the bit into my Jacobs chuck, in the tail stock, and very slowly and carefully, started drilling out the inside of the bowl. The bowl is a little more than seven inches in diameter, but the biggest hole I can make with a forstner bit is two and a half inches. Drilling this out was tedious, and slow and made a lot of smoke, but I got it done.


Now, I just had to widen the hole with the gouges. I decided to just use the carbide tools, hoping they would lessen the chances of getting a bad catch. I started with the round carbide bit, but found out that the square one seemed to do a better job, and was less prone to catches and tear-out.


I was very careful and took my time, making very shallow passes with the tool. It took forever, but I managed to get the inside hollowed out. Then, I was just about done, and I decided to try to make the bowl wall a little bit thinner, and BAM! - I got a catch bad enough to make me shut the lathe down in a hurry. I could tell something broke by the way it caught. looking at the piece, the side wall had cracked and a big chunk was about to fall out. Fortunately. all the pieces were still there, so I gently massages them back into place as best as I could, and started sealing up the cracks and gaps with copious amounts of CA glue.


After about a half hour of repair effort, I was finally satisfied that the cracks were all filled. I was too afraid to try to smooth out the excess glue with the carbide tool, or to try to make the wall any thinner, so I decided to put away the tools and start sanding. I had a LOT of sanding to do. The inside of the bowl was still really rough, and the CA glue was mounded up thick over the cracks. It probably took me over an hour to sand it down to an acceptable level.


After a crap-ton of sanding, I put several more coats of Shine Juice on, inside and out. Then, just for goods measure, I rubbed the surface with a block of carnuba wax and buffed it with a paper towel.


Ta-Da! Finished. What was only going to be a practice bowl, and which had a near fatal blow out, turned out to be my best bowl yet. The mortise worked, the copper inlay worked, the repair job worked. And this one even looks less like a flower pot and more like a cereal bowl. I was just about to give up on bowl making, but now I am less discouraged.


.
.
.
.


Looking nice :-)
ReplyDeleteI especially like the double copperwire inlay. Tried that once with a ring and could not get the wire to stick properly. Was using CA glue back then, will try epoxy if ever I feel the urge to do wireinlay again :-)
About you catches: When you're using the scrapers, are you turning below center? If not that could be the problem. Or trying to remoce too much wood at a time? Heavy cuts can cause problems.
The way I solved mysteries like that was that I started filming everything I did. And when something went wrong I watched the footage over and over until I got an idea of what exactly happened. Also you could upload the footage to youtube and ask some of the guys there. I'm sure the mystery would be solved in no time. Sometimes it's the small things that the pros forget to mention because they are second nature to them that trip newbies like me.
I just picked up a bunch of green logs recently, so I'm going to be getting a lot more practice with carving bowls. I'm probably going to be rough turning about 30 bowls in the next week or two.
ReplyDeleteWhoa, that's a big project!
ReplyDeleteTurning green wood is a completely different creature.
Be prepared to get yourself and the surrounding workspace really wet. You will be surprised how moist wood that is dry to the touch really is :-)
I like rough turning green wood. It is fast and cuts easily. I can make lots of shavings without thinking too much about the shape or details. It makes a huge mess, but is not dusty.
ReplyDeleteOh, and 30 is a very conservative number. I filled my car three times with logs. I was going to just store them out back until I was ready for them, but they are already starting to crack.
Three carloads of wood, nice!
ReplyDeleteWell, good turning then :-)